Configuring SSO for Keycloak
To configure SSO authentication on the Keycloak server side:
- Add a Keycloak IdP as described in the Managing Identity Providers section.
- Access Keycloak Administration Console.
- In the menu on the left, click Clients.
- At the top of the client list, click Create.
The Add Client page will open.
- Click Select file and select the file that you downloaded at step 1.
- In the Client ID field, specify the new connection name that will be displayed as the name of the client in the list.
- Click Save.
The client profile will open.
- On the Settings tab of the client profile, from the Name ID Format drop-down list, select email.
- On the Mappers tab of the client profile, click Create.
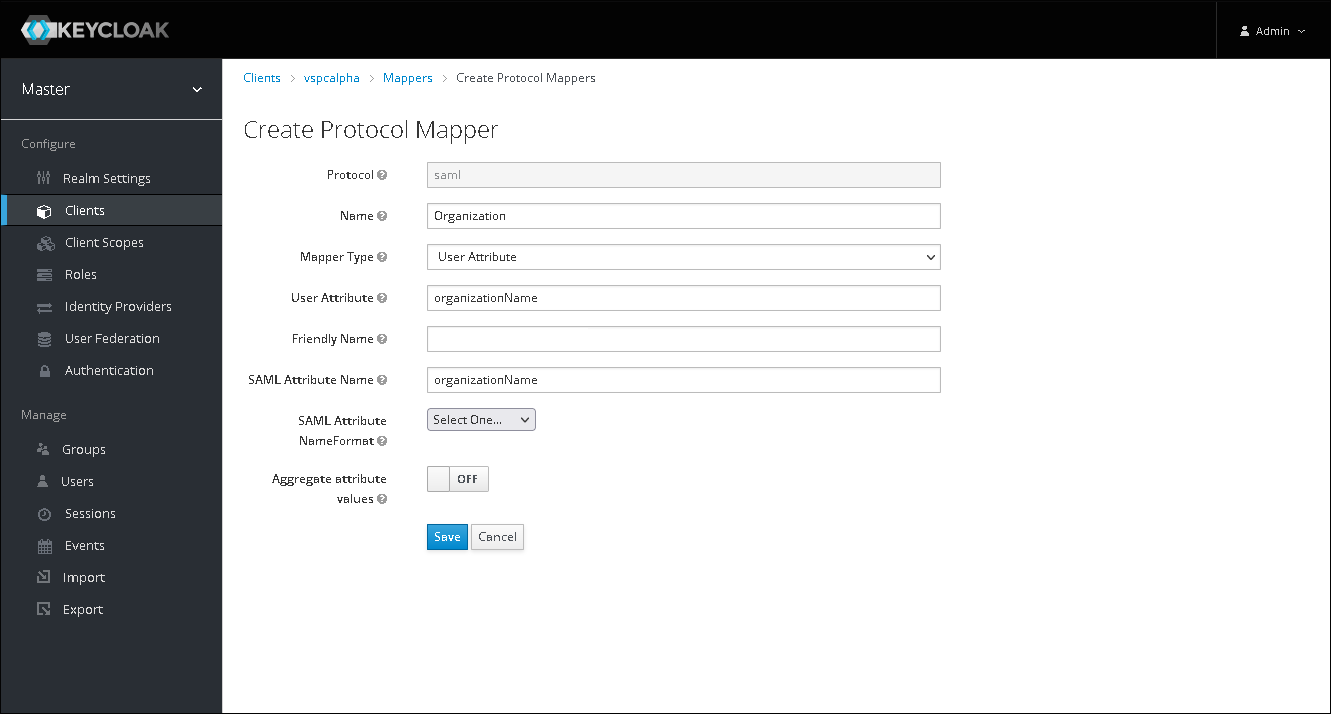
The Create Protocol Mapper page will open.
- Configure a user attribute mapper:
- In the Name field, specify a mapper name that will be displayed in the mapper list.
- From the Mapper Type drop-down list, select User Attribute.
- In the User Attribute field, specify the name of the attribute that will be assigned to a user configuration in Keycloak.
- In the SAML Attribute Name field, specify the attribute name that will be used to map the attribute to a Veeam Service Provider Console mapping rule claim.
User organization name mapper is required for Veeam Service Provider Console SSO authentication.You can add more mappers if needed.
- Click Save.
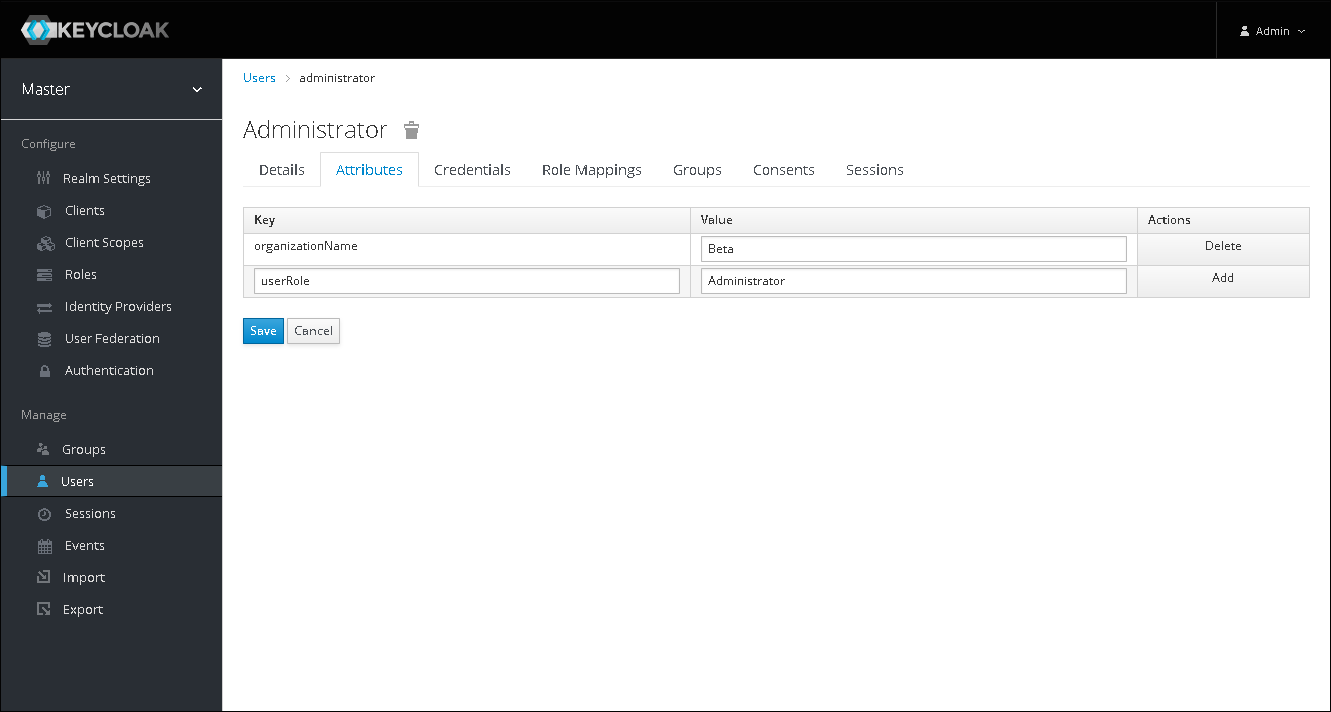
- Create users, if necessary.
- For each user profile, navigate to the Attributes tab and specify the user attributes:
- In the Key field, specify the name of an attribute that you provided in the User Attribute field at step 10.
- In the Value field, specify the attribute value for the user.