Creating Protected Computers Report
To create a Protected Computers report configuration:
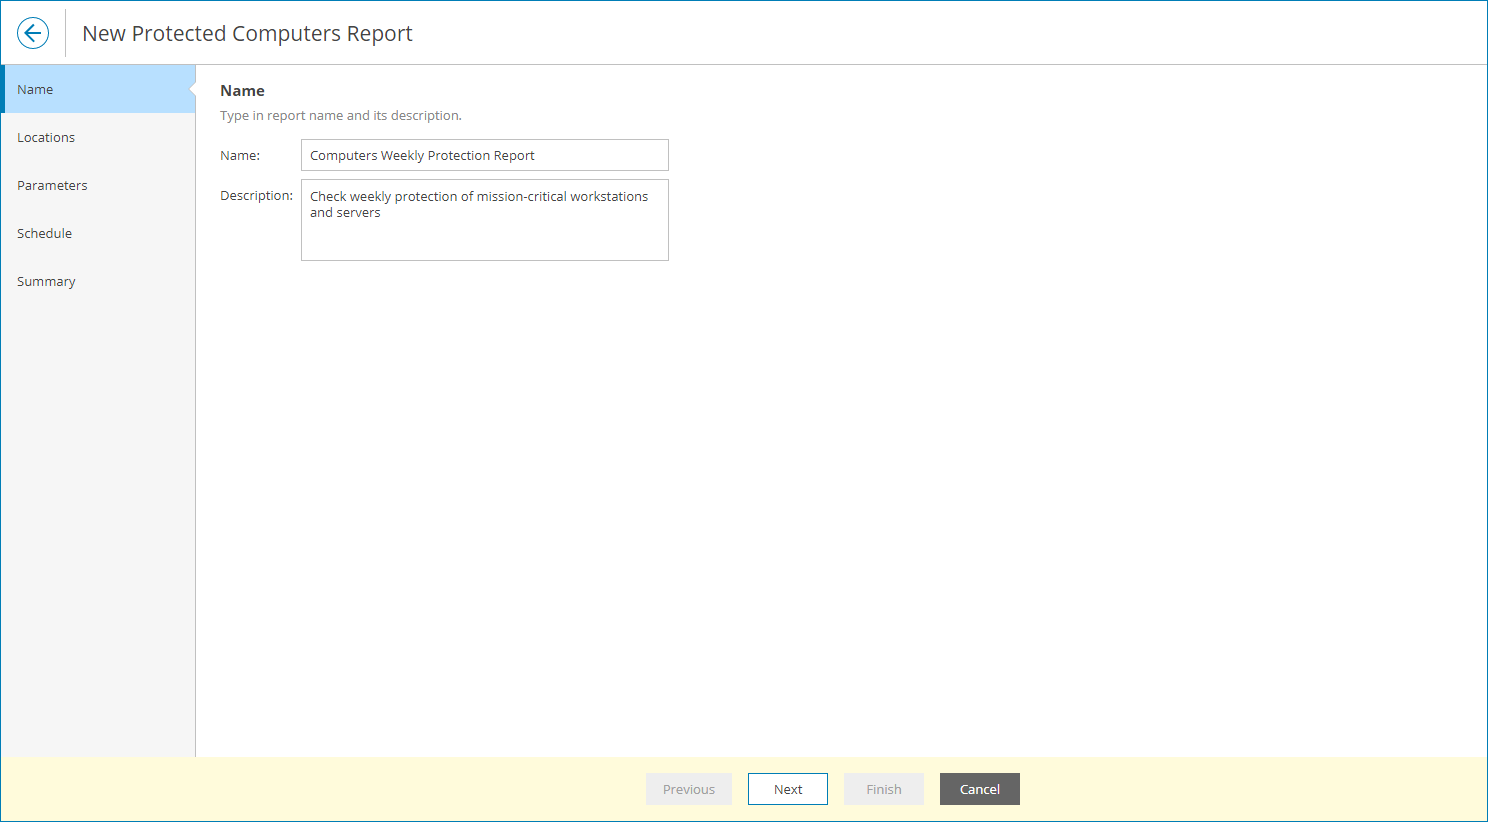
- At the Name step of the wizard, specify the report name and description.
The report name and description will be displayed in reports generated based on this report configuration.
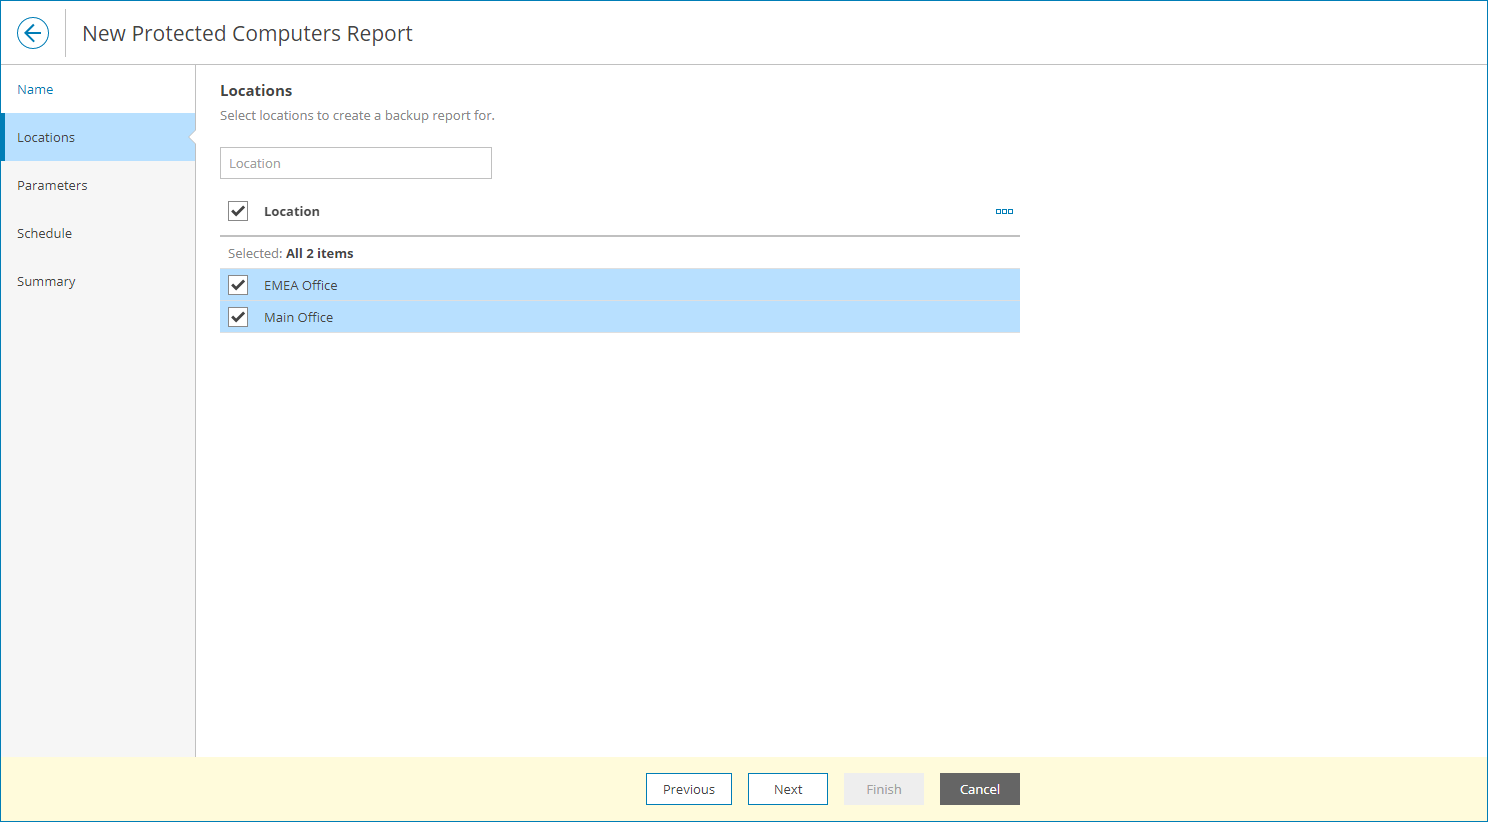
- At the Locations step of the wizard, select one or more company locations. Use the search field at the top to find the necessary location.
By choosing a location you can limit the scope of the report: only computers that belong to the chosen locations will appear in the report.
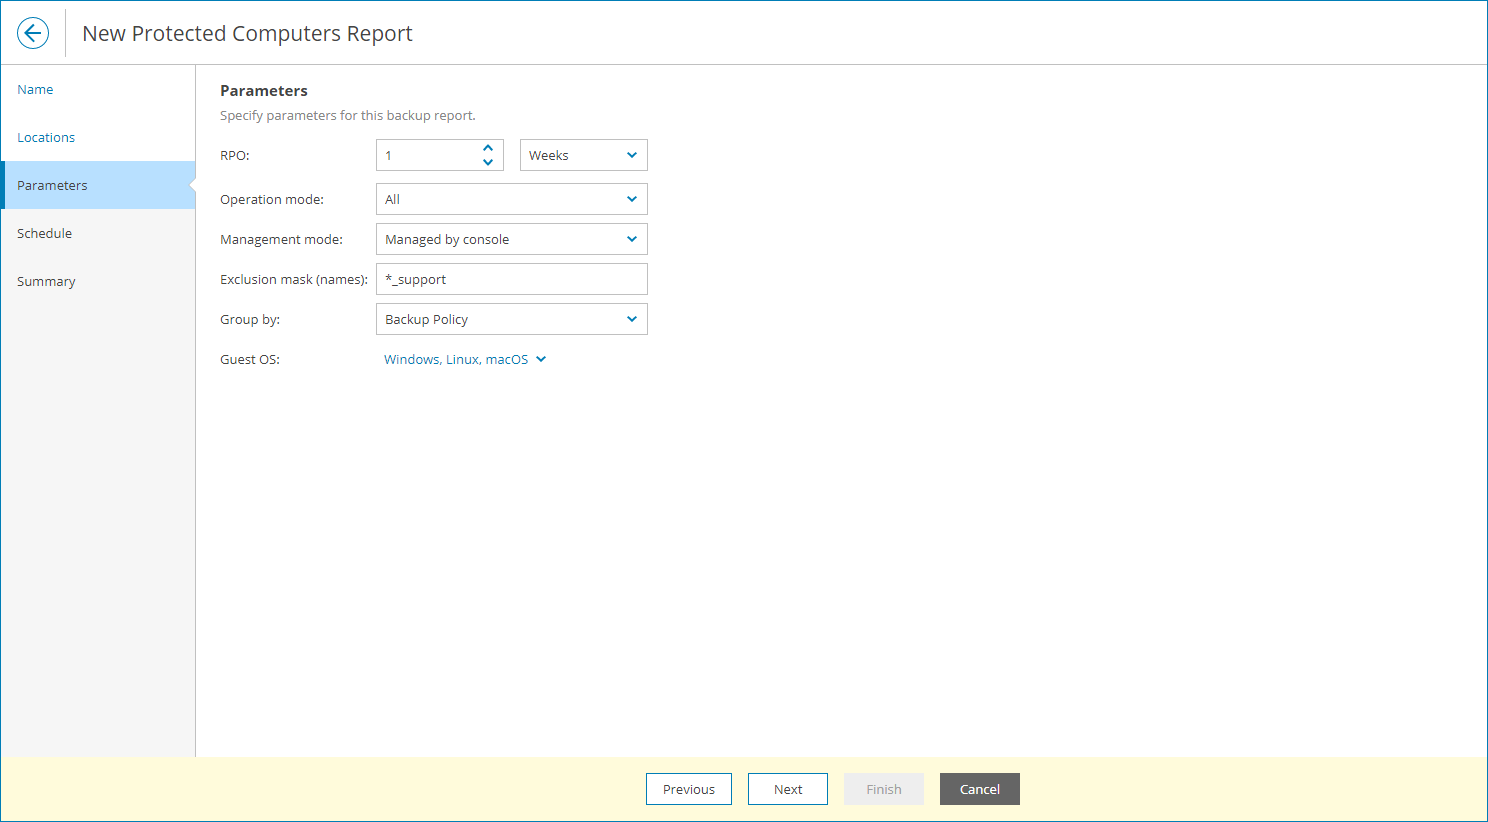
- At the Parameters step of the wizard, specify parameters for analyzing protected computers:
- In the RPO section, specify a period for which protected computers must have backup restore points.
RPO defines a period between backup sessions, or, in other words, a period for which you can afford to lose data. For example, if protected computers must have daily backups, specify 1 day or 24 hours as the RPO value.
- In the Operation mode list, choose what type of Veeam backup agent operation modes must be analyzed in the report (All, Server, Workstation).
- In the Management mode list, choose what computers must be analyzed in the report (All, Managed by console, Managed by backup server).
- In the Exclusion mask (names) field, specify a mask for excluding computers from the report scope.
The mask will be evaluated against the computer names. You can use the ‘*’ (asterisk) and ‘?’ (question mark) wildcards in the mask. The ‘*’ (asterisk) character stands for zero or more characters. The ‘?’ (question mark) stands for a single character. For example, if you want to exclude from the report computers with the _support suffix, you can specify a mask with the ‘*_support’ name query.
You can specify more than one mask in the field. Separate multiple masks with commas.
- In the Group by list, choose how analyzed data must be grouped in the report (by Backup Agent or Backup Policy).
- In the Guest OS list, select guest OS for computers that must be analyzed in the report (Windows, Linux, macOS).
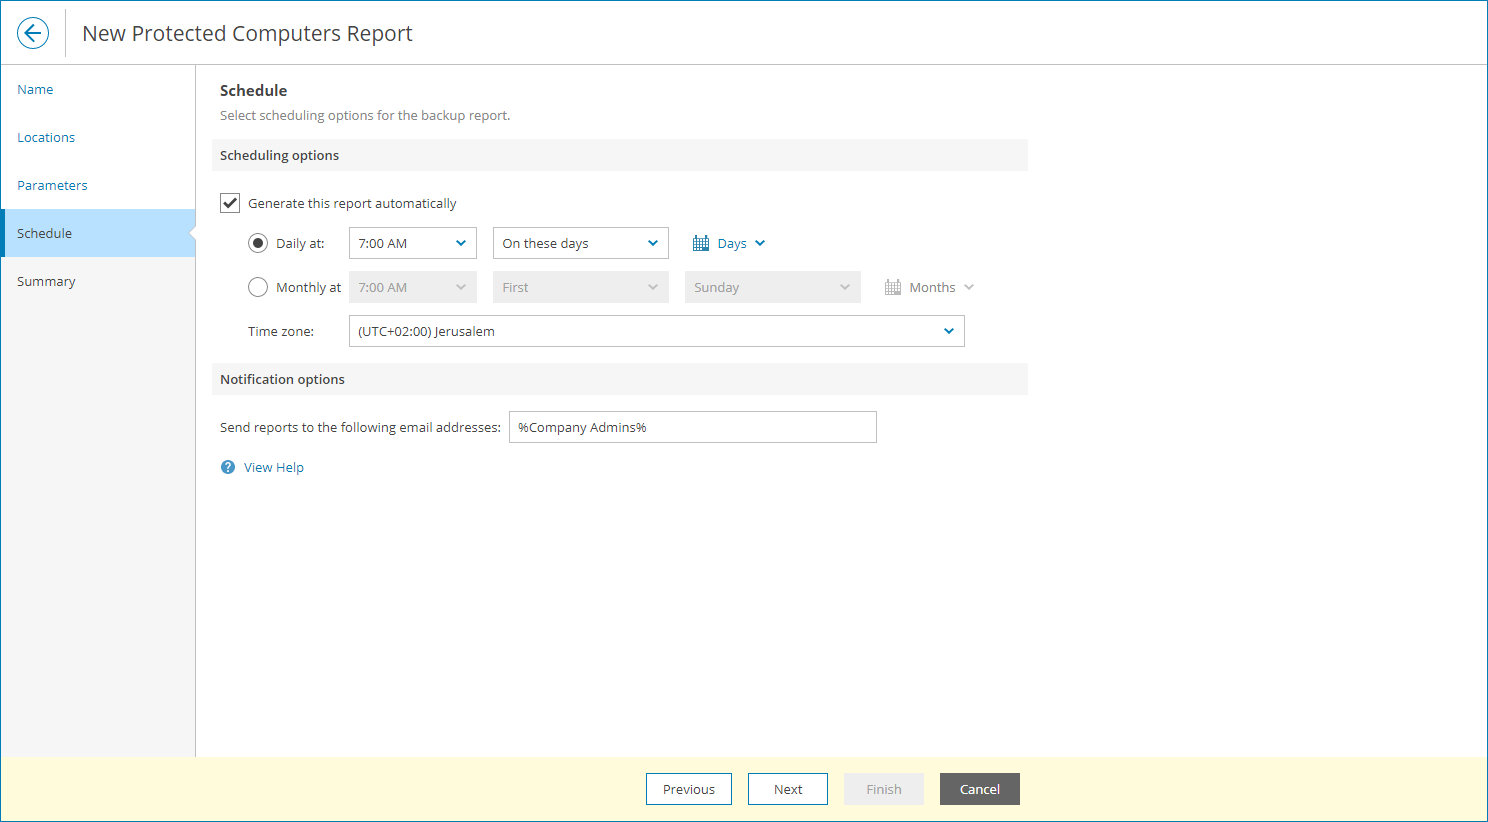
- At the Schedule step of the wizard, specify a schedule according to which the report must be generated:
- In the Scheduling options section, select the Generate this report automatically check box to enable scheduling and define report scheduling:
- To generate the report at specific time daily, on defined week days or with specific periodicity, select the Daily at option. Use the fields on the right to configure the necessary schedule.
- To generate the report once a month on specific days, select the Monthly at option. Use the fields on the right to configure the necessary schedule.
- From the Time zone drop-down list, select the time zone in which the daily or monthly schedule must be run.
- In the Notification options section, provide the email address to which the report must be sent.
You can specify multiple email addresses separated with commas (,) or semicolons. To send a notification to multiple users with a specific role, you can use email variables. For a list of available email variables, click View Help.
To receive the report, the user must configure an email address in the user profile. For details, see .
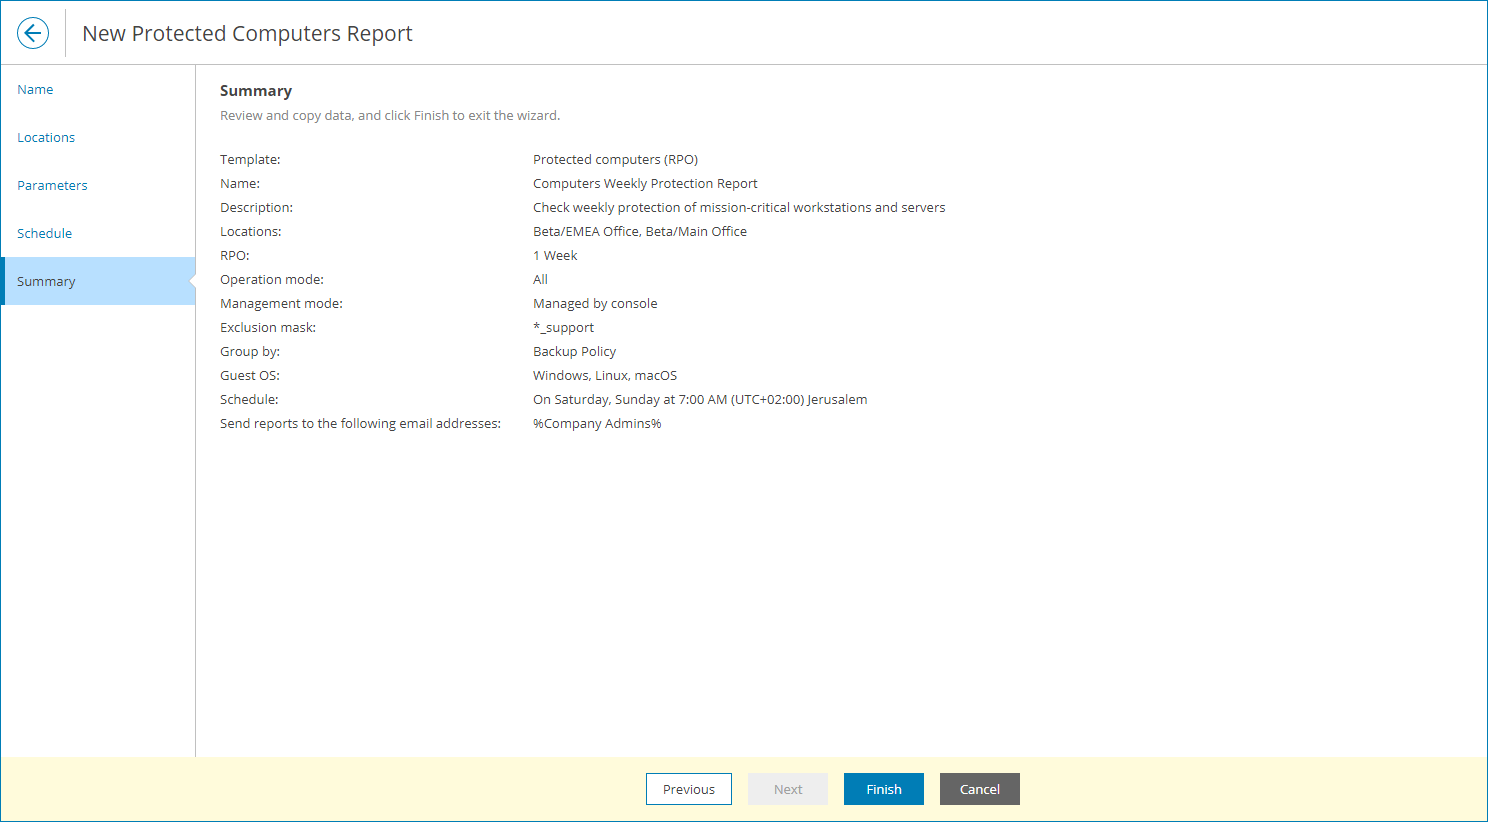
- At the Summary step of the wizard, review the report configuration and click Finish.
