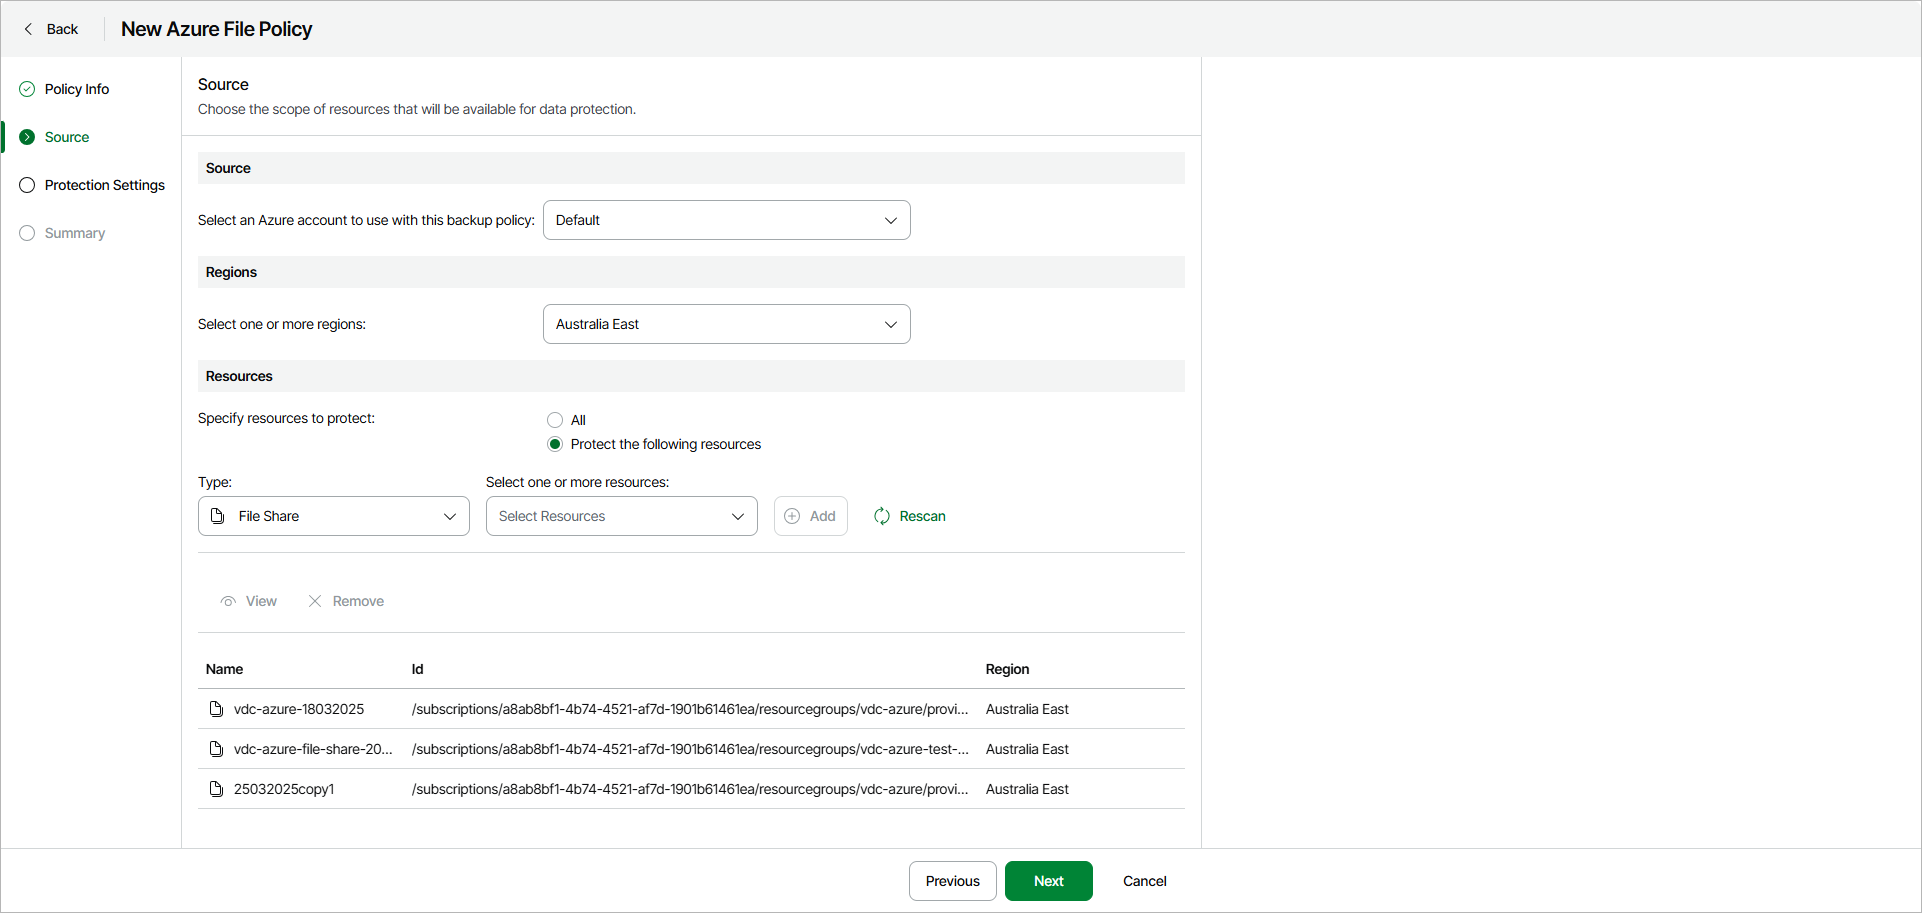
Step 3. Specify Policy Source
At the Source step of the wizard, specify an Azure account, region and resources to back up:
- In the Source section, select an Azure account that has access to Azure resources that you want to protect with the backup policy.
- In the Regions section, select regions whose resources you want to protect with the backup policy. Click Select All to add all available resources. Click Clear All to clear the selection.
- In the Resources section, specify file shares that you want to protect with the backup policy:
- Select All if you want to protect all file shares in the selected region.
- Select Protect the following resources if you want to protect specific file shares in the selected region.
- [For the Protect the following resources option] Specify the following:
- From the Type drop-down list, choose a selection criteria for the file shares that you want to protect. You can select the following options:
- File Share — select this option if you want to protect specific file shares.
- Resource Group — select this option if you want to protect all file shares from specific resource groups.
- From the Select one or more resources drop-down list, select resources that you want to protect. Click Add.
|
tip |
|
Resources are synchronized every 24 hours. If you do not see recently added resources in the list, click Rescan to force synchronization. |
If you need to remove a resource from the backup scope, select the resource and click Remove.