Step 4. Allocate Backup Resources
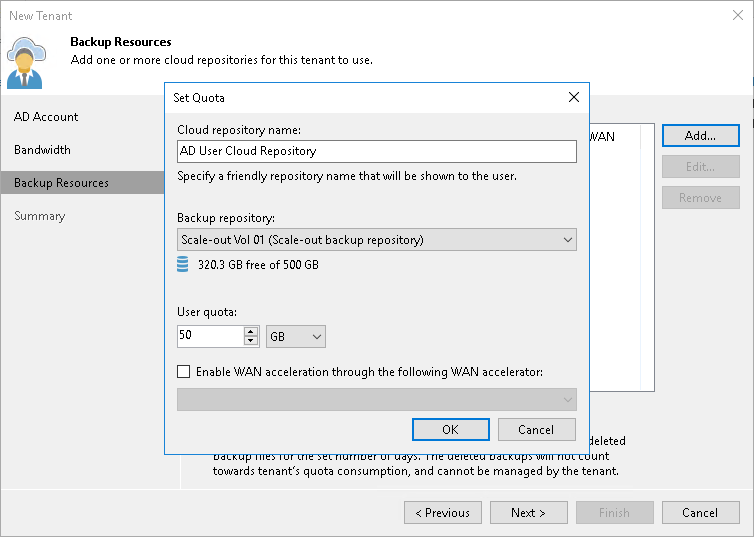
The Backup Resources step of the wizard is available if you selected the Backup storage check box at the AD Account step of the wizard. At this step of the wizard, specify cloud repository quota settings for the created tenant account. You can assign to the tenant a single quota on one cloud repository or several quotas on different cloud repositories.
To assign a cloud repository quota:
- Click Add on the right of the Cloud repositories list.
- In the Cloud repository name field of the Set Quota window, enter a friendly name for the cloud repository you want to present to the tenant. The name you enter will be displayed in the list of backup repositories on the tenant side.
- From the Backup repository list, select a backup repository in your backup infrastructure whose space resources must be allocated to the tenant.
- In the User quota field, specify the amount of space you want to allocate to the tenant on the selected backup repository.
- Click OK.
- Repeat steps 1–5 for all backup repositories in your backup infrastructure whose resources you want to allocate to the tenant.
- If you want to protect tenant backups against unwanted deletion, select the Keep deleted backup files for <N> days check box and specify the number of days to keep a backup in the recycle bin after a backup is deleted by the tenant. To learn more, see Insider Protection.
Note |
Consider the following:
|
