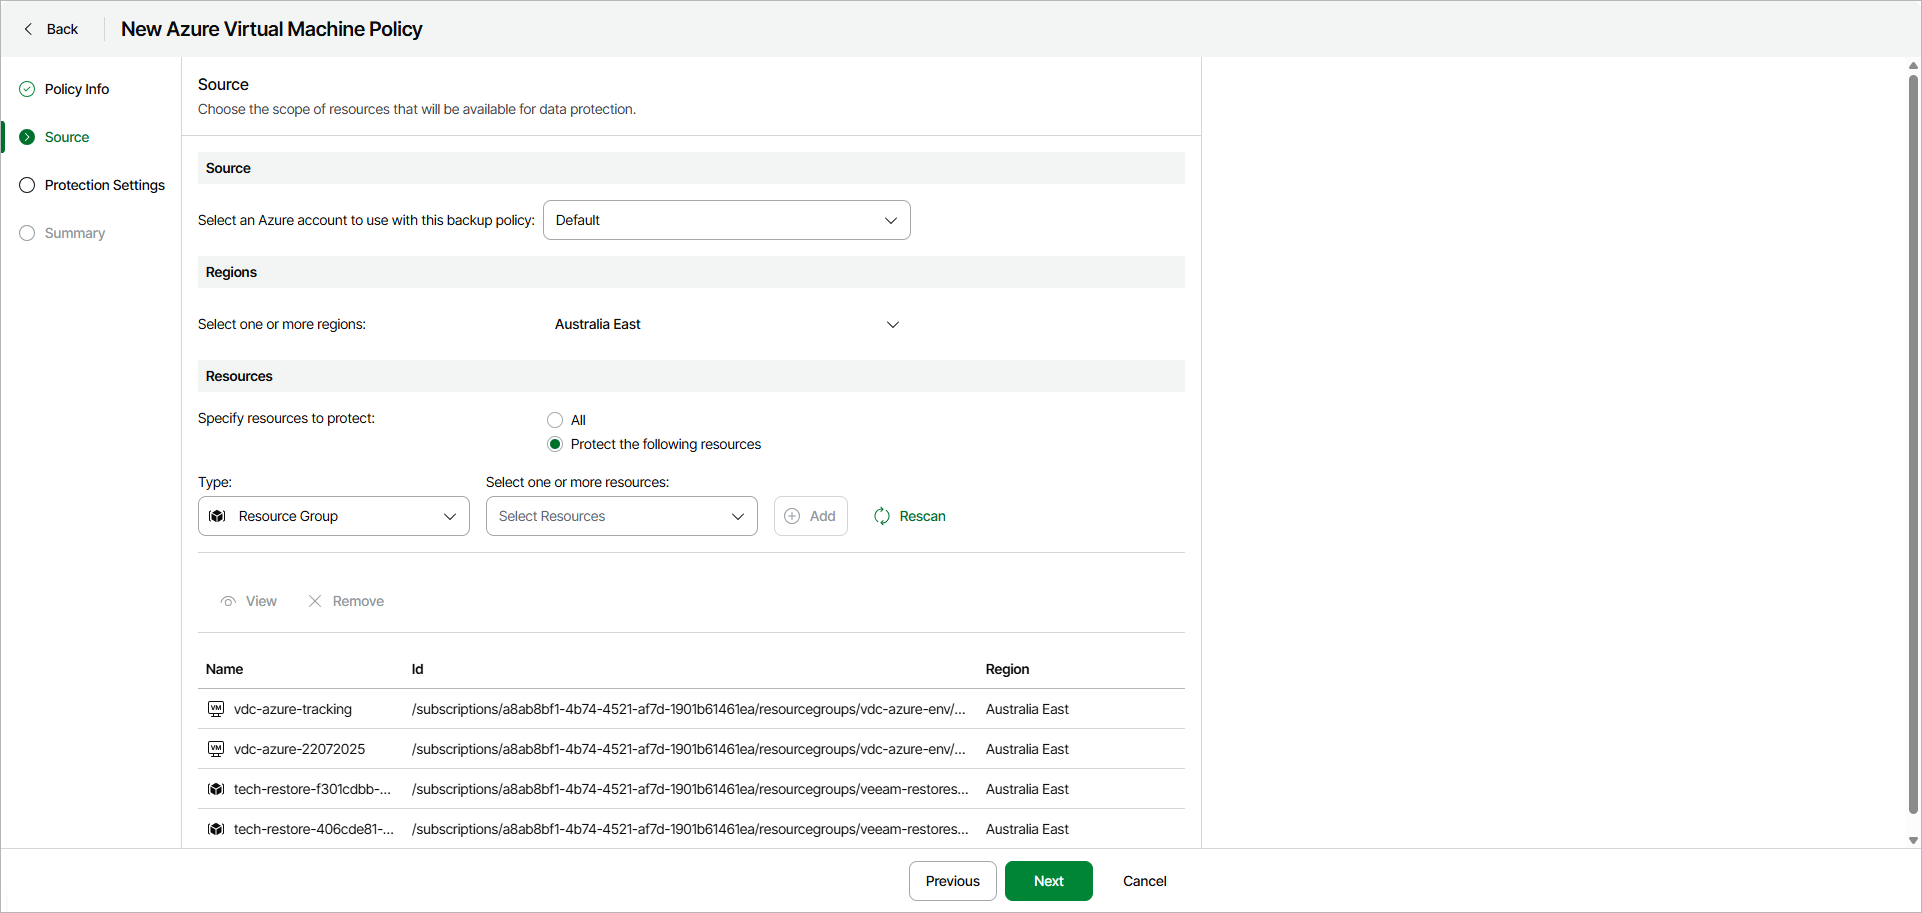
Step 3. Specify Policy Source
At the Source step of the wizard, specify an Azure account, region and resources to back up:
- In the Source section, specify an Azure account that has access to Azure resources that you want to protect with the backup policy.
- In the Regions section, select regions whose resources you want to protect with the backup policy.
|
Note |
|
To store backups, Veeam Data Cloud for Microsoft Azure automatically creates a repository in every Azure region whose resources are protected by the backup policy. |
- In the Resources section, specify virtual machines that you want to protect with the backup policy:
- Select All resources if you want to protect all virtual machines in the selected region.
- Select Protect the following resources if you want to protect specific virtual machines in the selected region.
- [For the Protect the following resources option] Specify the following:
- From the Type drop-down list, choose a selection criteria for the virtual machines that you want to protect. You can select the following options:
- Virtual machines — select this option if you want to protect specific virtual machines.
- Resource Group — select this option if you want to protect all virtual machines from specific resource groups.
- Tag — select this option if you want to protect virtual machines with specific tags.
- Subscription — select this option if you want to protect all virtual machines in the selected Azure subscription.
- From the Select one or more resources drop-down list, select resources that you want to protect and click Add.
Repeat steps a and b for each virtual machine or group of virtual machines that you want to add to the backup scope.
|
tip |
|
Resources are synchronized every 24 hours. If you do not see recently added resources in the list, click Rescan to force synchronization. |
If you need to remove a resource from the backup scope, select the resource and click Remove.
- If you want to exclude some virtual machines from the backup, in the Resources section, click Select resources to exclude. In the Specify resource to exclude window, choose a selection criteria from the Type drop-down list. You can select the following options:
- Virtual Machine — select this option if you want to exclude specific virtual machines. Find the necessary virtual machine in the Name or ID drop-down list and click Exclude.
- Tag — select this option if you want to exclude virtual machines with specific tags. Select a tag from the Key and Value drop-down lists and click Exclude.
To exclude multiple virtual machines at a time, click Browse to select a target from the global list, select check boxes next to the necessary virtual machines, and click Exclude.
If you need to remove a virtual machine from the exclusion list, select the virtual machine and click Remove. To save the exclusion settings, click Apply.
- If you want to exclude some disks from the backup, in the Disks section, set the Exclude disks toggle to On and click Choose disks to exclude. In the Choose disk to exclude window, specify disks that you want to exclude:
- To exclude system disks of all protected virtual machines, set the Exclude system disks toggle to On.
- To exclude specific disks, in the Exclude specific disks section, choose a selection criteria from the Type drop-down list. You can select the following options:
- Disk — select this option if you want to exclude specific disks. Find the necessary disk in the Name or ID drop-down list and click Exclude.
- Tag — select this option if you want to exclude disks with specific tags. Select a tag from the Key and Value drop-down lists and click Exclude.
To exclude multiple disks at a time, click Browse to select a target from the global list, select check boxes next to the necessary disks, and click Exclude.
If you need to remove a disk from the exclusion list, select the disk and click Remove. To save the exclusion settings, click Apply.