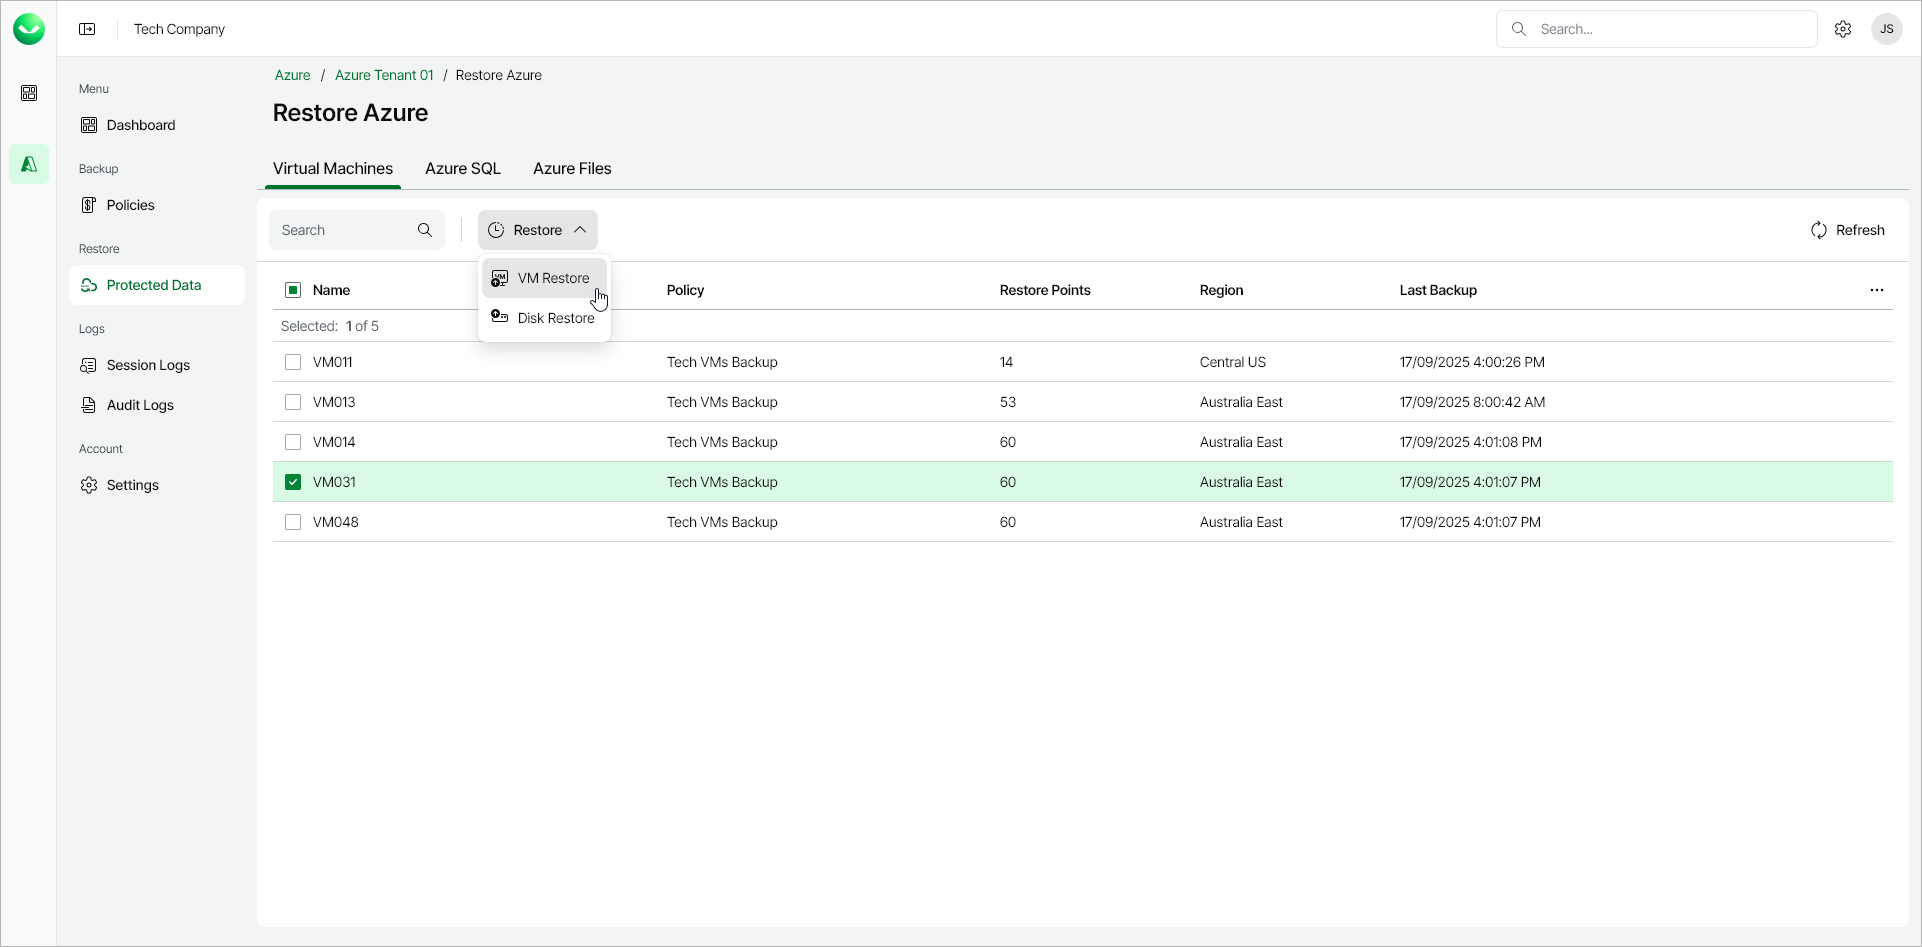
Step 1. Launch Restore Virtual Machines Wizard
To launch the Restore Virtual Machines wizard, do the following:
- In the Backups section of the main menu, select Protected Data.
- On the Virtual Machines tab, select the Azure VM that you want to restore.
Note |
You can select one or multiple Azure VMs to restore. To select all the protected Azure VMs for restore, select the check box next to the Name column header. |
Tip |
You can also launch the Restore Virtual Machines wizard with a preselected restore point. To do this, click the link in the Restore Points column, then in the Available Restore Points window, select a restore point. |
- Click Restore > VM Restore. Alternatively, right-click your selection and, in the context menu, choose Restore > VM Restore.
Important |
|
VM restore is available only from restore points that include the operating system disk of the protected VM. When you start entire VM restore, Veeam Data Cloud for Microsoft Azure displays only restore points that are compatible with this restore operation. If no compatible restore points are available, the VM Restore option is unavailable. You can still restore the data included in the backup using the Disk Restore and File-Level Recovery options. For more information about disk exclusion, see Specify Policy Source. |