Shared Folder Settings
The Network Share step of the wizard is available if you have chosen to save the backup to a network shared folder.
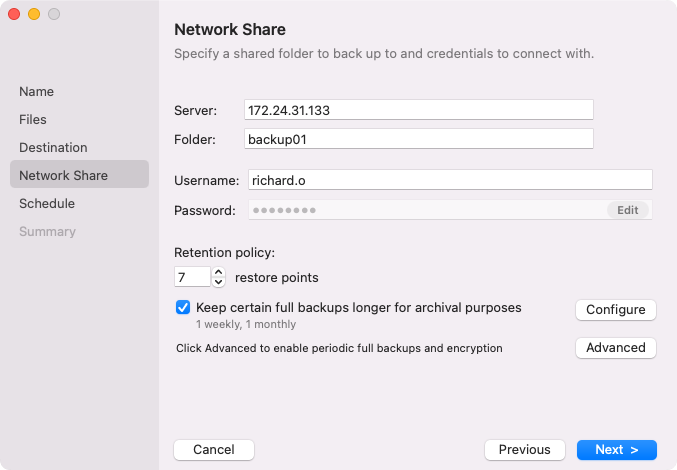
Specify the shared folder settings:
- In the Server field, type an IP address or domain name of the server that hosts the shared folder.
- In the Folder field, type a name of the network shared folder in which you want to store backup files.
- If the network shared folder requires authentication, specify credentials to access the network shared folder:
- In the Username field, type a name of the account that has access permissions on the shared folder.
- If necessary, in the Domain field, type a name of the domain in which the account that has access permissions on the shared folder is registered.
- In the Password field, type a password of the account that has access permissions on the shared folder.
- In the Retention policy field, specify the number of days for which you want to store backup files in the target location. After this period is over, Veeam Agent will remove from the backup chain any restore points that are older than the specified retention period. By default, Veeam Agent keeps backup files for 7 days. To learn more, see Backup Retention Policy.
- To specify the GFS retention policy, select the Keep certain full backups longer for archival purposes check box and press Configure. In the Configure GFS window, specify how weekly, monthly and yearly full backups must be retained. For details, see Specify GFS Retention Policy.
- Click Advanced to specify advanced settings for the backup job. To learn more, see Specify Advanced Backup Settings.