Step 2. Save Restored Files
After Veeam Agent opens the Veeam Backup browser displaying the contents of the backup file, you can perform the following restore operations with the files and folders:
After you finish working with files and folders, close the Veeam Backup browser.
Saving Files to Initial Location
To save files or folders from a backup file to their initial location on the computer:
- Select the necessary items in the file system tree.
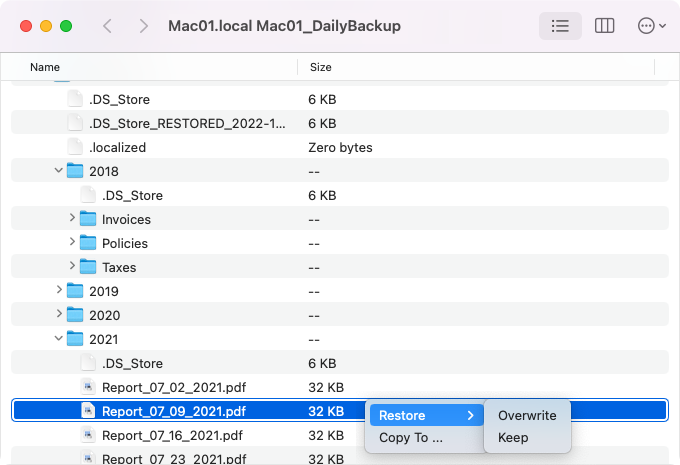
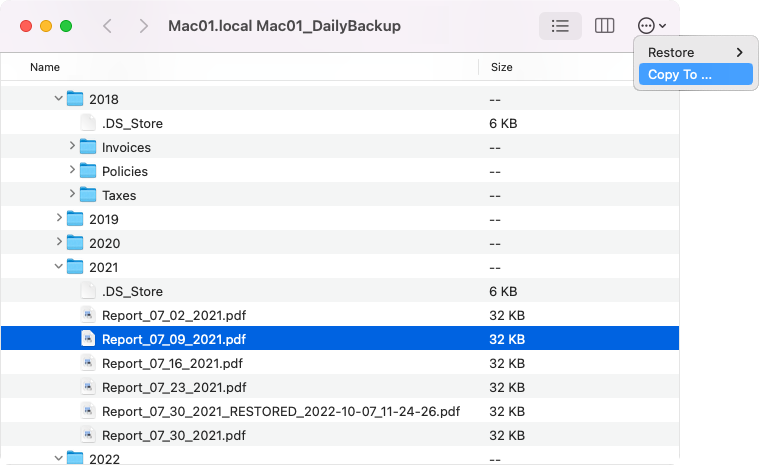
- Launch the restore options menu by doing either of the following:
- Right-click the selected items.
- Open the Options menu in the top right corner of the browser window.
- Select one of the available restore actions.
- To overwrite the original item on your computer with the item restored from the backup, select Restore > Overwrite.
- To save the item restored from the backup next to the original item on your computer, select Restore > Keep. Veeam Agent for Mac will add the -RESTORED postfix with a time stamp to the restored file or folder name and save it in the same location where the original file resides.
- Select the necessary items in the file system tree.
- Launch the restore options menu by doing either of the following:
- Right-click the selected items
- Open the Options menu in the top right corner of the browser window.
- Select the Copy To action.
- In the Finder window, specify the location for the copied items.
You can browse restored files and folders only while the Veeam Backup browser is open. After the Veeam Backup browser is closed, Veeam Agent unmounts the backup content from your computer.
We recommend that you close the Veeam Backup browser after you finish restoring files and folders. Every 5 minutes, Veeam Agent checks if there is any activity in the Veeam Backup browser. If the user or product components and services have not performed any actions for 30 minutes, Veeam Agent automatically closes the Veeam Backup browser.

