Veeam Cloud Connect Settings
If you have selected to store backup files on a Veeam Cloud Connect repository, specify settings to connect to the cloud repository:
- Specify service provider settings.
- Specify user account settings and verify certificate.
- Select the cloud repository.
NOTE |
The Veeam Cloud Connect repository option is available only in the Workstation and Server editions of Veeam Agent for Mac. |
Specifying Service Provider Settings
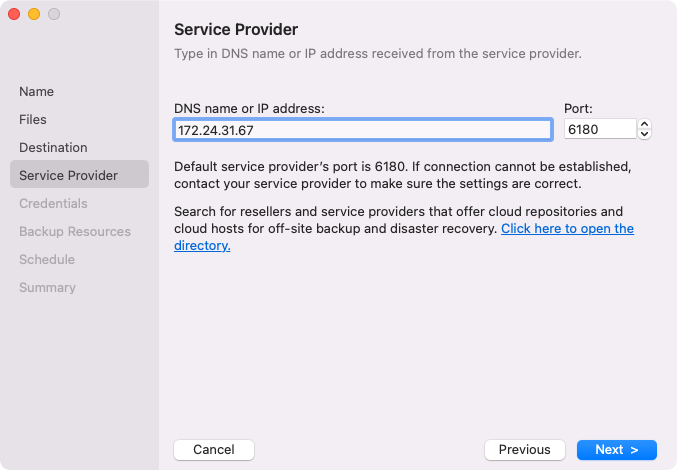
The Service Provider step of the wizard is available if you have chosen to save backup files on a Veeam Cloud Connect repository.
Specify settings for the cloud gateway that the Veeam Cloud Connect service provider (SP) or your backup administrator has provided to you:
- In the DNS name or IP address field, enter a full DNS name or IP address of the cloud gateway.
- In the Port field, specify the port over which Veeam Agent will communicate with the cloud gateway. By default, Veeam Agent uses port 6180.
Specifying User Account Settings and Verifying Certificate
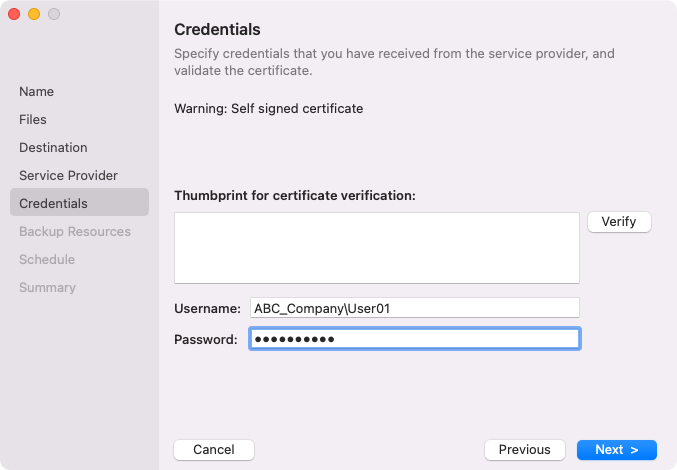
The Credentials step of the wizard is available if you have chosen to save backup files on a cloud repository and specified settings for the cloud gateway.
- In the Username field, enter the name of the tenant or subtenant account that the SP or your backup administrator has provided to you. The name of the subtenant account must be specified in the TENANT\SUBTENANT format.
- In the Password field, provide a password for the tenant or subtenant account.
- [Optional] To validate the certificate of the SP server with a thumbprint, do the following:
- In the Thumbprint for certificate verification field, paste the thumbprint you obtained from the SP.
- Click Verify. Veeam Agent will check if the thumbprint you entered matches the thumbprint of the obtained TLS certificate. To the dialog that confirms successful certificate validation, click OK.
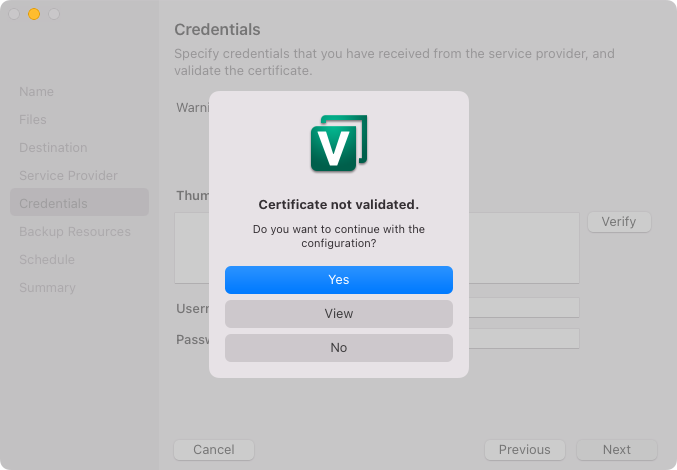
If the certificate has not been verified on the Veeam Agent computer, after you click Next at the Credentials step of the wizard, you will be asked to verify the certificate.
In the displayed dialog window, select one of the following options:
- Yes — select this option to immediately verify the certificate.
- View — select this option to view the details of the certificate. After you view the certificate details, select Accept to verify the certificate.
- No — select this option to cancel the certificate verification.
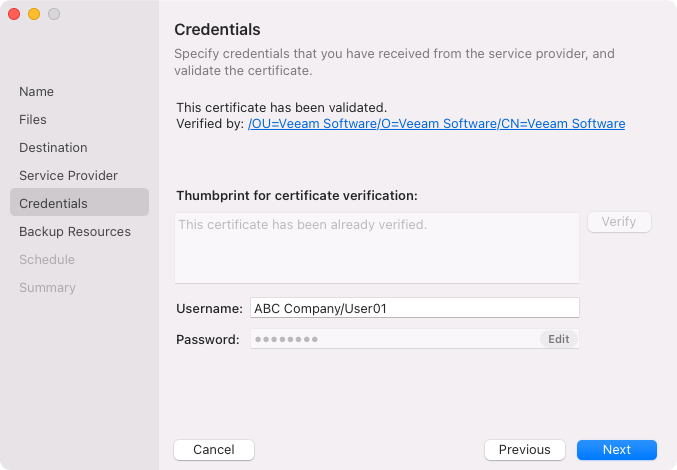
After the certificate is verified, you will automatically move to the Backup Resources step of the wizard.
You can, at any time, view the details of the verified certificate by clicking the active link in the Verified by field at the Credentials step of the wizard.
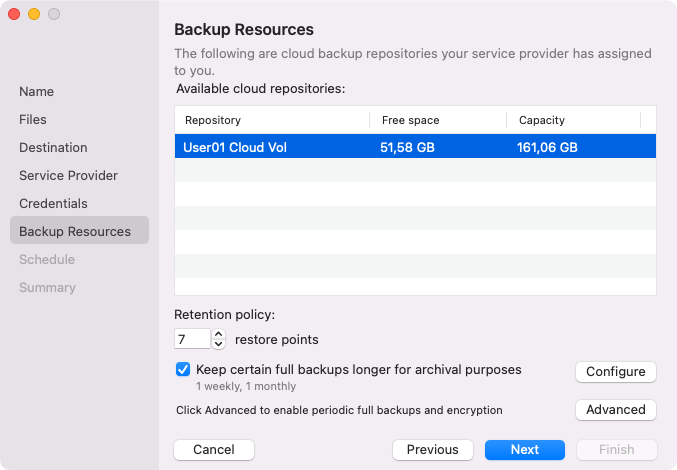
The Backup Resources step of the wizard is available if you have chosen to save backup files on a cloud repository and specified settings to connect to the SP.
Specify settings for the cloud repository:
- From the Available cloud repositories list, select a cloud repository where you want to store created backups. The Available cloud repositories list displays only those cloud repositories that can be accessed by the tenant or subtenant account that you use to connect to the service provider.
- In the Retention policy field, specify the number of days for which you want to store backup files in the target location. After this period is over, Veeam Agent will remove from the backup chain any restore points that are older than the specified retention period. By default, Veeam Agent keeps backup files for 7 days. To learn more, see Backup Retention Policy.
- To specify the GFS retention policy, select the Keep certain full backups longer for archival purposes check box and press Configure. In the Configure GFS window, specify how weekly, monthly and yearly full backups must be retained. For details, see Specify GFS Retention Policy.
- Click Advanced to specify advanced settings for the backup job. To learn more, see Specify Advanced Backup Settings.
