Specifying Existing Service Account
The Specify existing service account option allows you either to connect a service account to another Azure AD application, or to edit any of the service account settings using the Azure AD application to which the service account is currently connected. However, consider that you can only specify an Azure AD application if it is not connected to any other service account.
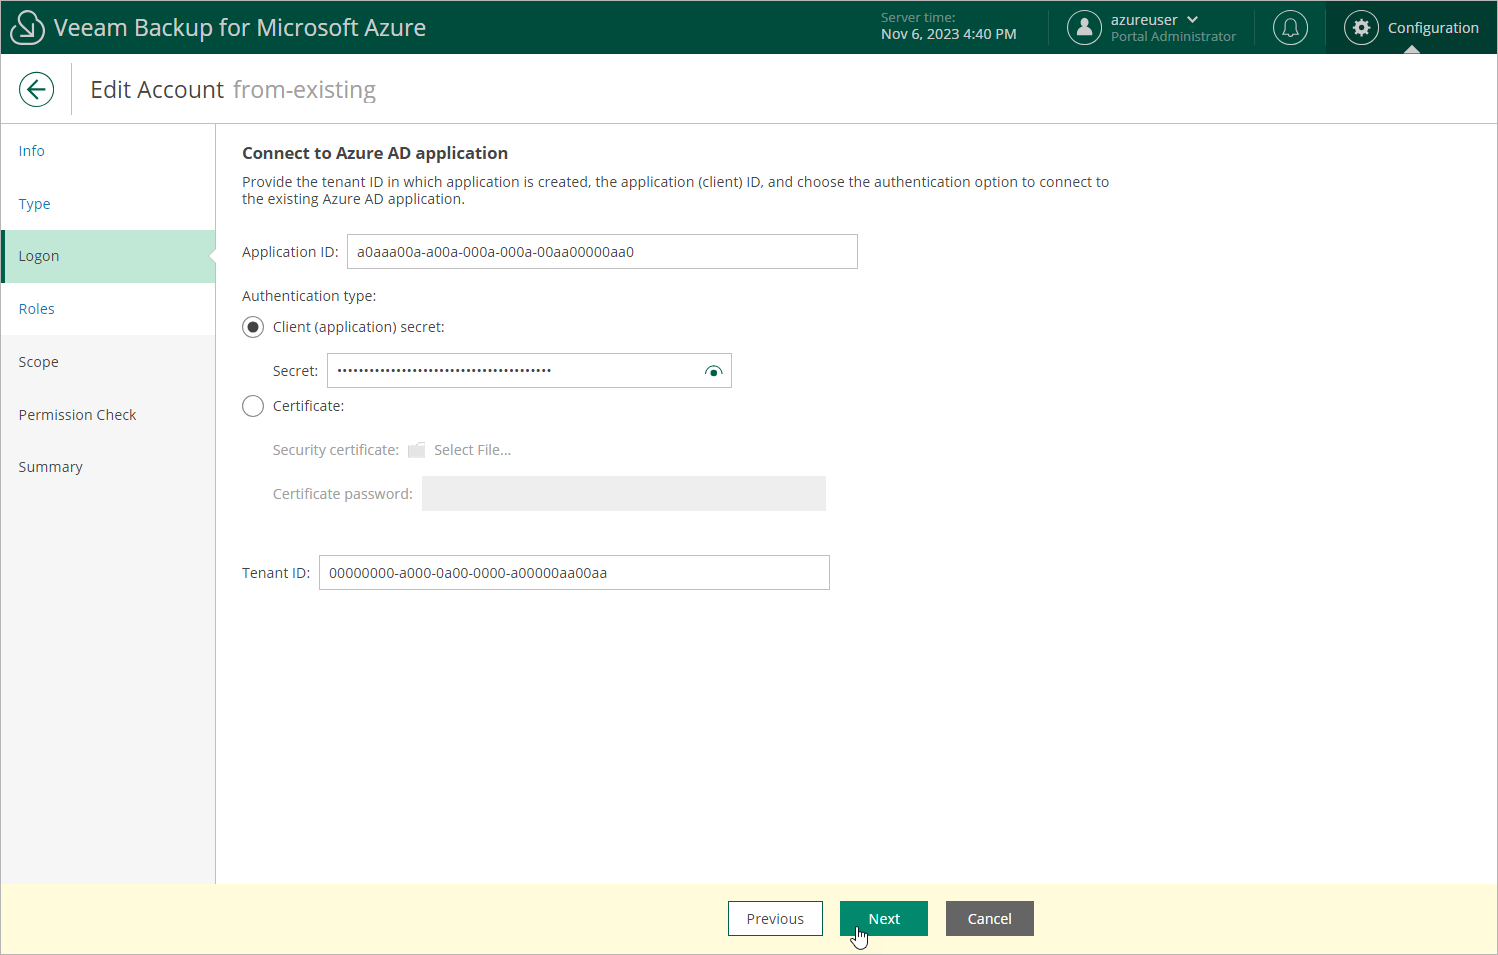
To edit the service account settings by specifying an existing service account that grants access to your Azure resources, perform the following steps:
- At the Logon step of the wizard, do the following:
- In the Application ID field, enter the application identifier. You can find the identifier on the Overview page of your Azure AD application in the Microsoft Azure portal. For more information, see Microsoft Docs.
- In the Authentication type field, use either of the following options:
- To use a client secret created in the specified Azure AD application, select the Client (application) secret option. Then, enter the secret value. To learn how to create client secrets, see Microsoft Docs.
- To use a certificate uploaded to the specified Azure AD application, select the Certificate option and click Select File to locate the certificate. Then, provide a password used to encrypt the certificate. To learn how to upload certificates to Azure AD applications, see Microsoft Docs.
Important |
Veeam Backup for Microsoft Azure supports certificates only in the .PFX and .P12 formats. |
- In the Tenant ID field, enter the tenant ID of the specified Azure AD application.
You can find the tenant ID on the Overview page of your Azure AD application in the Microsoft Azure portal. For more information, see Microsoft Docs.
- To modify the list of operations that Veeam Backup for Microsoft Azure can perform using permissions of the service account, follow the instructions provided in section Adding Service Accounts (step 4).
- To change the backup scope of the service account, follow the instructions provided in section Adding Service Accounts (step 5).
- To check whether the service account has all the required permissions, follow the instructions provided in section Adding Service Accounts (step 6).
- At the Summary step of the wizard, review configuration information and click Finish.