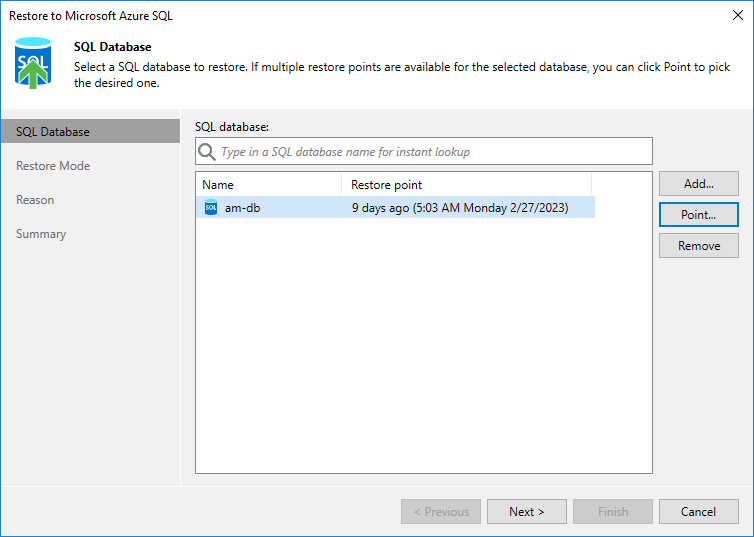
Step 2. Select SQL Database and Restore Point
At the SQL database step of the wizard, choose a restore point that will be used to restore the selected Azure SQL database. By default, Veeam Backup & Replication uses the most recent valid restore point. However, you can restore the database data to an earlier state.
To select a restore point, do the following:
- In the SQL database list, select the SQL database and click Point.
- In the Restore Points window, expand the backup policy that protects the SQL database, select the necessary restore point and click OK.
To help you choose a restore point, Veeam Backup & Replication provides the following information on each available restore point:
- Job — the name of the backup policy that created the restore point and the date when the restore point was created.
- Type — the type of the restore point.
- Location — the repository where the restore point is stored.
Tip |
You can use the wizard to restore multiple databases at a time. To do that, click Add, select more databases to restore and choose a restore point for each of them. |
