Step 2. Select Restore Point
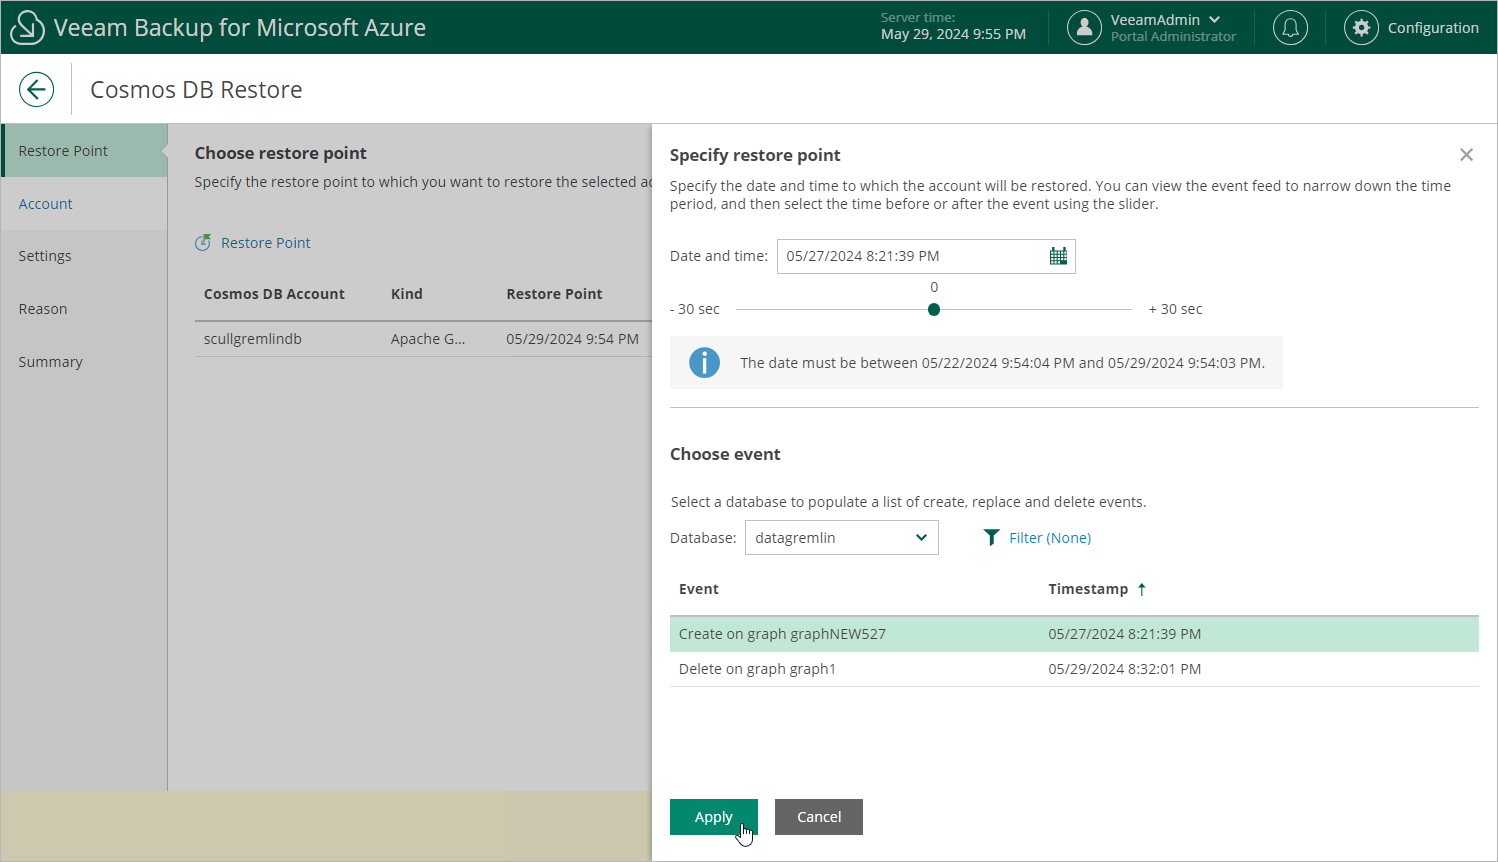
At the Restore Point step of the wizard, select a timestamp that will be used to restore the selected Cosmos DB account. By default, Veeam Backup for Microsoft Azure uses the most recent valid timestamp. However, you can restore the account data to an earlier state.
To select a timestamp, do the following:
- Click Restore Point.
- In the Specify restore point window, use either of the following options:
- Specify the timestamp manually. To do that, click the calendar icon next to the Date and time field, choose the timestamp within the available restore window, and click Apply.
- Choose a specific event to identify the necessary timestamp. To do that, select a database whose event you want to use, choose the event from the list of available events, and click Apply.
To adjust the timestamp, you can use the slider below the Date and time field.
|
Notes |
|