Step 6. Specify Disk Settings
[This step applies only if you have selected the Restore to a new location, or different settings option at the Restore Mode step of the wizard]
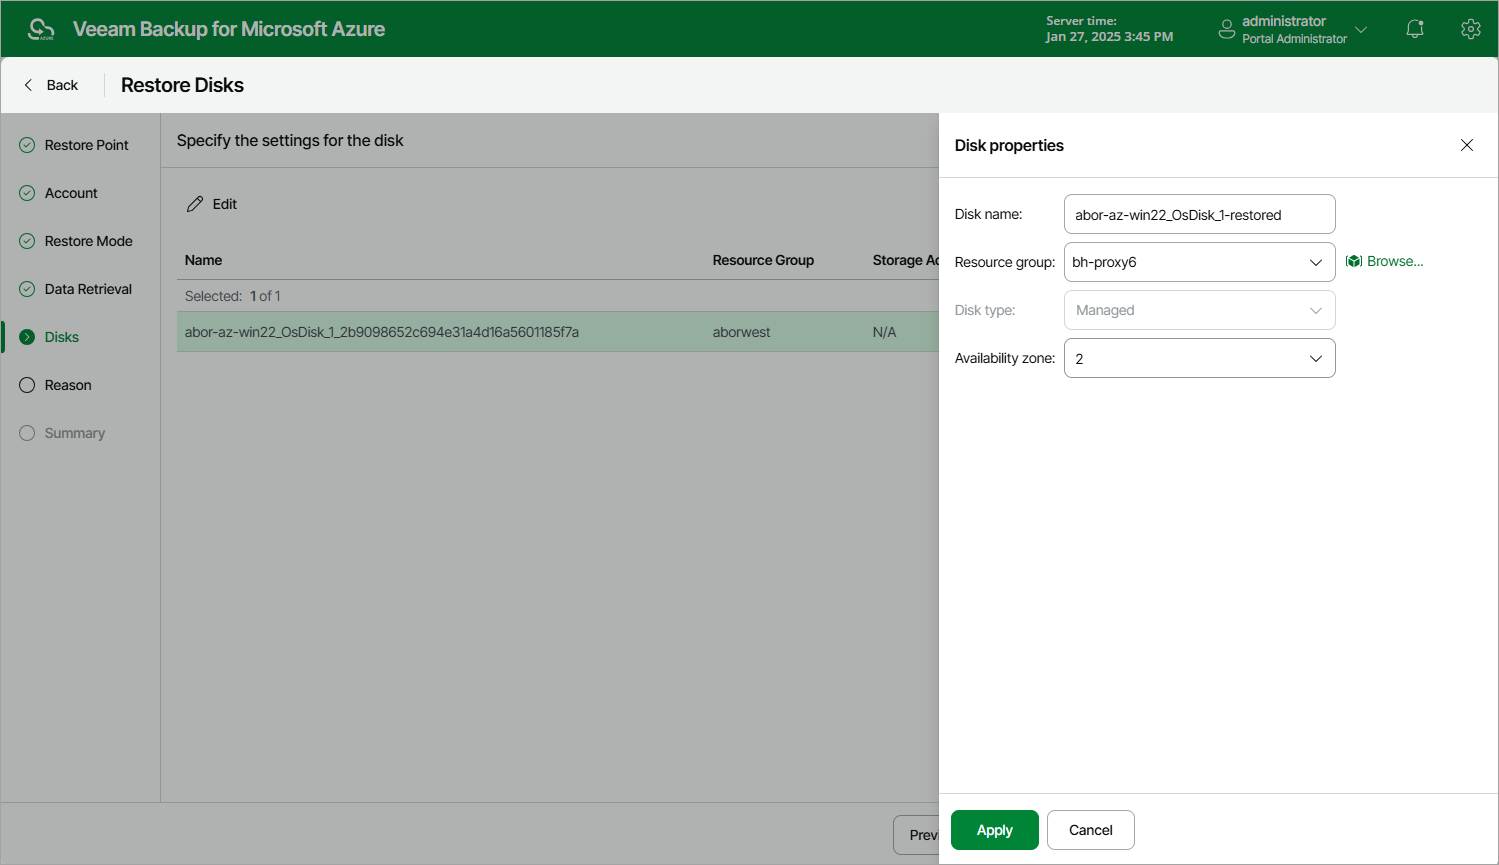
At the Disks step of the wizard, you can configure disk properties for each restored virtual disk:
- Select the necessary disk.
- Click Edit.
- In the Disk properties window, do the following:
- In the Disk name field, specify a new name for the restored virtual disk.
- From the Resource group drop-down list, select a resource group to which the restored virtual disk will belong.
For a resource group to be displayed in the list of available resource groups, it must be created in the Microsoft Azure portal as described in Microsoft Docs.
- From the Disk type drop-down list, select a type for the restored virtual disk. For more information on disk types, see Microsoft Docs.
Note |
You cannot convert managed virtual disks into unmanaged, but you can convert unmanaged virtual disks into managed. |
- [Applies only to unmanaged disks] From the Storage account drop-down list, select an Azure storage account to which you want to restore the selected virtual disk.
For a storage account to be displayed in the Storage account list, it must be created in the Microsoft Azure portal as described in Microsoft Docs.
- [Applies only to managed disks] From the Availability zone drop-down list, select an availability zone to which you want to place the restored virtual disk.
- To save changes made to the virtual disk settings, click Apply.
