Step 3. Select Files and Folders to Back Up
At the Files and Folders step of the wizard, select files and folders that you want to back up.
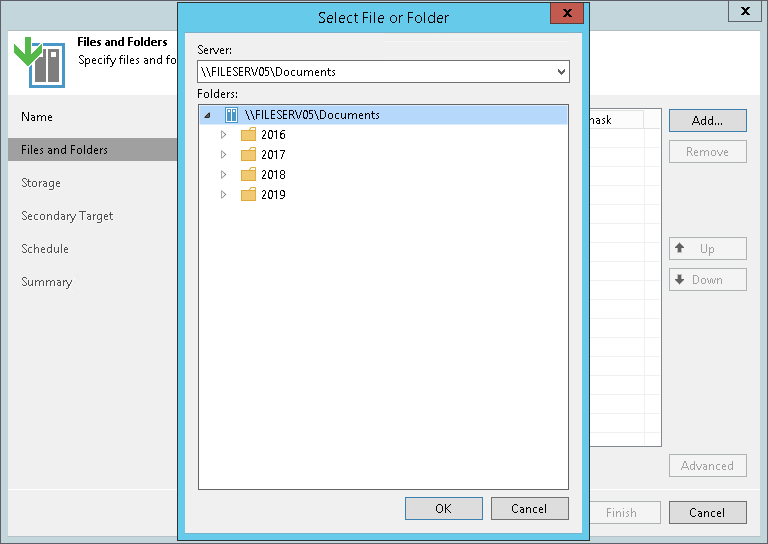
- Click Add.
- From the Server list, select a file share on which the necessary files or folders reside.
Note |
If you plan to protect file shares residing on the enterprise storage system, you can choose between two different approaches. For more information, see NAS Backup Integration with Storage Systems. |
- In the Folders tree, select folders you want to backup.
Note |
If you select a NAS filer from the Server list, but the Folders tree is empty, make sure that the storage system rescan was performed and finished. For more information about the storage system rescan process, see Storage Discovery Process. |
To select multiple folders, hold [Ctrl] and click necessary folders. Although different folders of the same share form separate records in the table, they will be processed by one job task.
Mind the following:
- Hard links in file shares are protected with content included.
- Symbolic links in file shares are protected as links, without the content they refer to.
- In the Files and Folders screen, use the Up and Down buttons on the right to move sources up or down. The sources of the job are processed in the order in which the list displays them.
- If you add a folder to the job, all the folder contents will be processed.
If necessary, you can choose only specific files from the added folder.
Including/Excluding Files and Folders
To filter files and folders that you want to back up from the selected folder, you can specify the file name and extension masks.
To specify filters:
- Select a file share folder in the list and click Advanced.
- In the File Filters window, use Include masks and Exclude masks fields to filter the folder contents:
- To include content, you can create name masks or use exact file names. For example:
- To backup only PDF files, enter *.PDF in the Include masks field and click Add.
- To backup all files with name sales_report.xlsx, enter sales_report.xlsx in the Include masks field and click Add.
- To exclude content, you can use name masks, exact file names, or specify the path to the folder or the whole file share to exclude. For example:
- To exclude PDF files from processing, enter *.PDF in the Exclude masks field and click Add.
- To exclude all files with name pricelist.xlsx from processing, enter pricelist.xlsx in the Exclude masks field and click Add.
- To exclude folder 2016 from processing, you can enter the full path to it in the Exclude masks field and click Add. For example, for an NFS file share this path looks like: QA04:/NFS04/Documents/2016, for an SMB file share — \\fileserv05\Documents\2016).
Alternatively, you can specify a relative path to the folder or file to exclude. In case of the NAS filer, this is the only option to specify a path to exclude. For example, to exclude folders where snapshots are located from all file shares residing on the NAS filer, specify /~snapshot (this mask will exclude the snapshot folder from processing for all NFS file shares on this NAS filer) and \~snapshot (this mask will exclude the snapshot folder from processing for all SMB file shares on this NAS filer).
You can exclude a whole file share from processing. For example, you add the \\Server\ SMB server to the file share backup job, but you want to exclude the \\Server\Sharing file share from processing. To exclude this file share from processing, enter the \\Server\Sharing path in the Exclude masks field and click Add. The job will back up all file shares that Veeam Backup & Replication detects on this server, but will skip the excluded file share.
Note |
Mind the following:
As a workaround, you can exclude the volume(s) in the Access Options of the NAS filer itself.
|
