Creating Full VM Backup with VeeamZIP
You can use Veeam plug-in for vSphere Client to create an ad-hoc VeeamZIP backup of a VM. For more information on VeeamZIP, see the VeeamZIP section of the Veeam Backup & Replication User Guide.
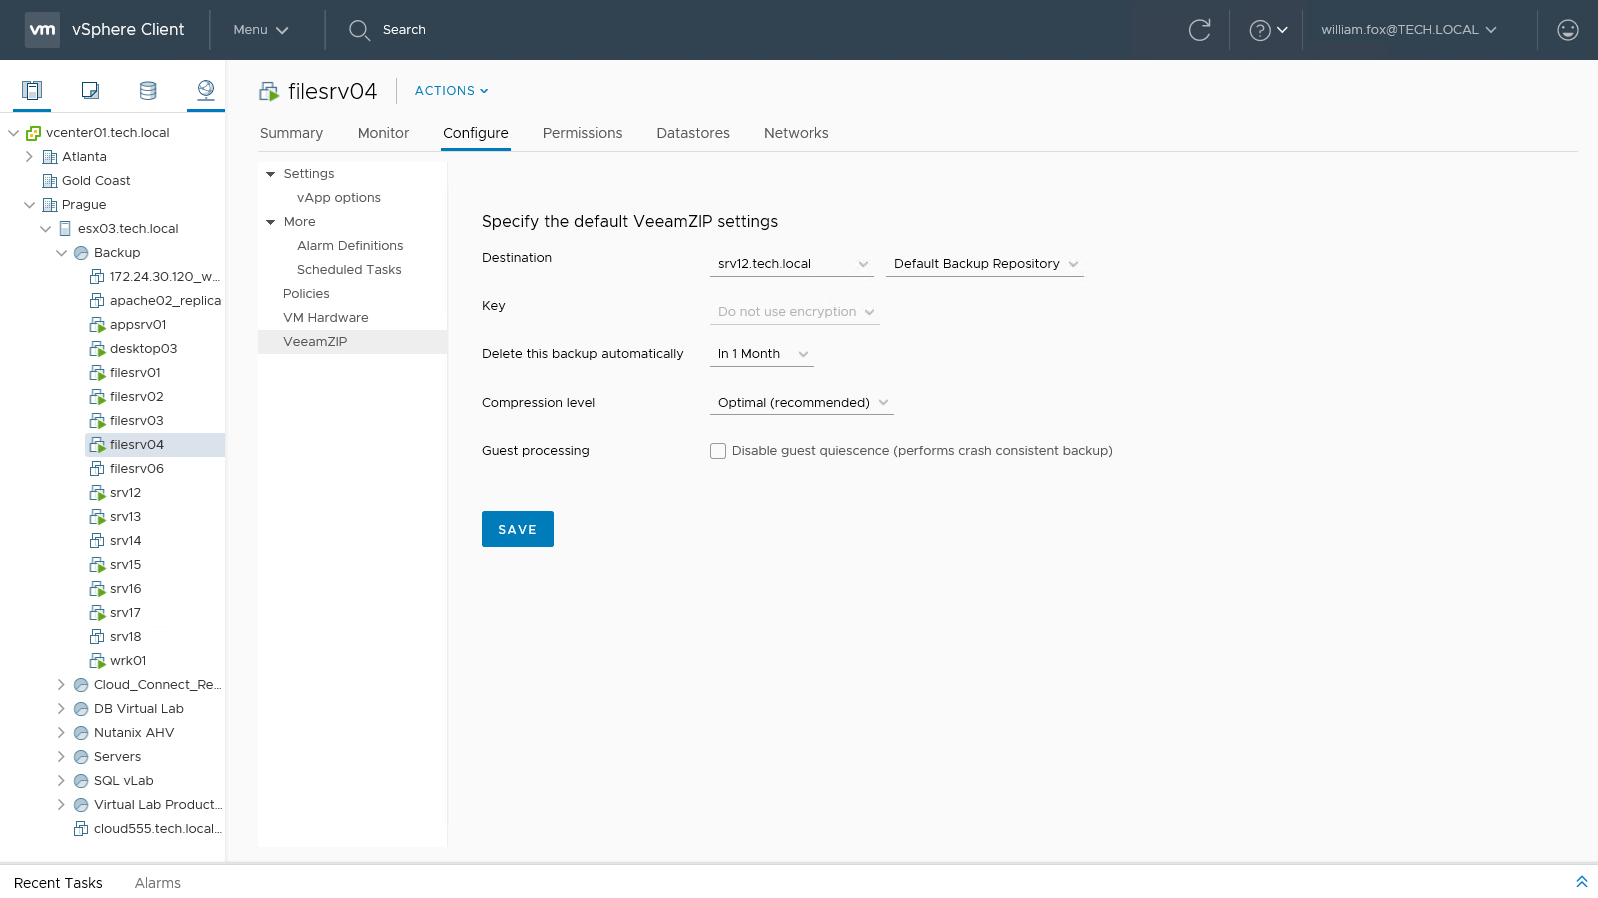
To configure the settings for VeeamZIP (VBK file creation), do the following:
- In vSphere Client, open vCenter Inventory.
- In the inventory tree, select a VM.
- Click the Configure tab and select VeeamZIP.
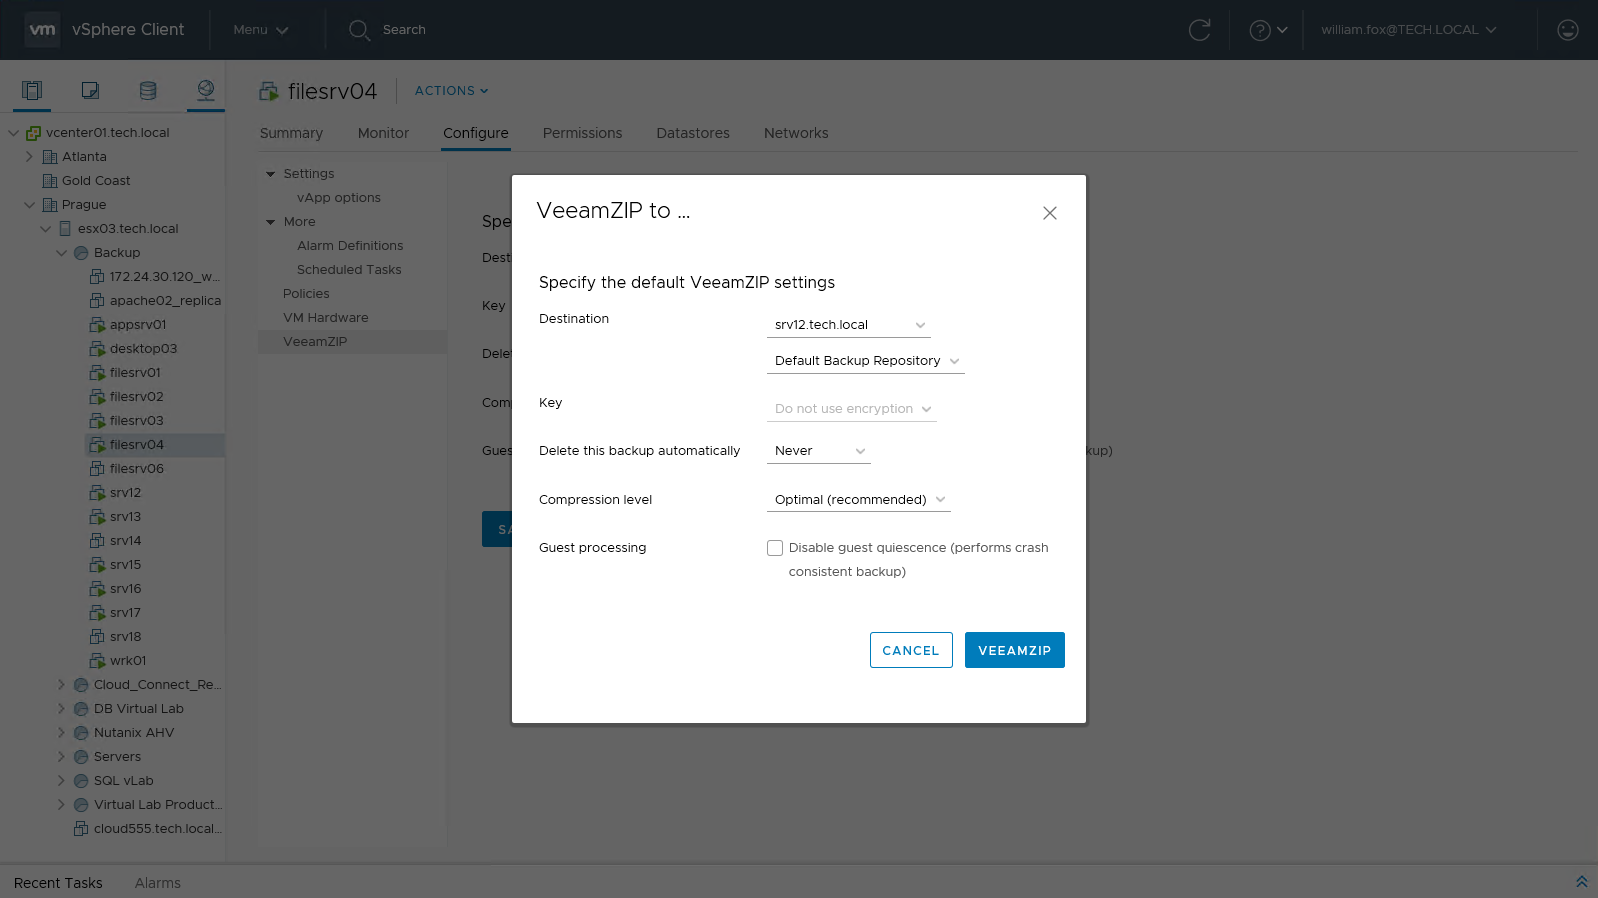
- In the Destination section, select the Veeam backup server to process the VM and the repository where to store the VeeamZIP file.
Note |
To be visible in this list, Veeam backup server should be added to Veeam Backup Enterprise Manager. Connected repositories from Veeam backup infrastructure will be shown automatically. |
- In the Key section, specify the encryption key if necessary.
- In the Delete this backup automatically section, specify whether the resulting backup file should be automatically deleted after a certain time interval.
- In the Compression level section, select the necessary compression level for the backup.
- By default, the Disable guest quiescence option is selected, meaning that guest OS quiescence is deactivated. So, if you want a crash-consistent backup, leave it that way.
If you want, however, an application-consistent backup, then clear the Disable guest quiescence check box, and Veeam will create a transactionally consistent image of VMs using VMware Tools quiescence for guest OS.
Note |
For more information about guest OS quiescence, see the Transaction Consistency section of the Veeam Backup & Replication User Guide. |
- Click Save. The specified settings will be stored as default settings for the currently logged on user account and will be used for VeeamZIP backup.
Creating Full VM Backup with VeeamZIP
You can use Veeam plug-in for vSphere Client to create an ad-hoc VeeamZIP backup of a VM. To create a full VM backup with VeeamZIP:
- In vSphere Client, open vCenter Inventory.
- In the inventory tree, right-click the VM that you want to back up and select one of the following options:
- Select Backup > VeeamZIP if you want to create a backup using the default VeeamZIP settings specified earlier. Alternatively, use the Actions > Backup > VeeamZIP option.
Veeam will start the VeeamZIP backup process using the default VeeamZIP settings.
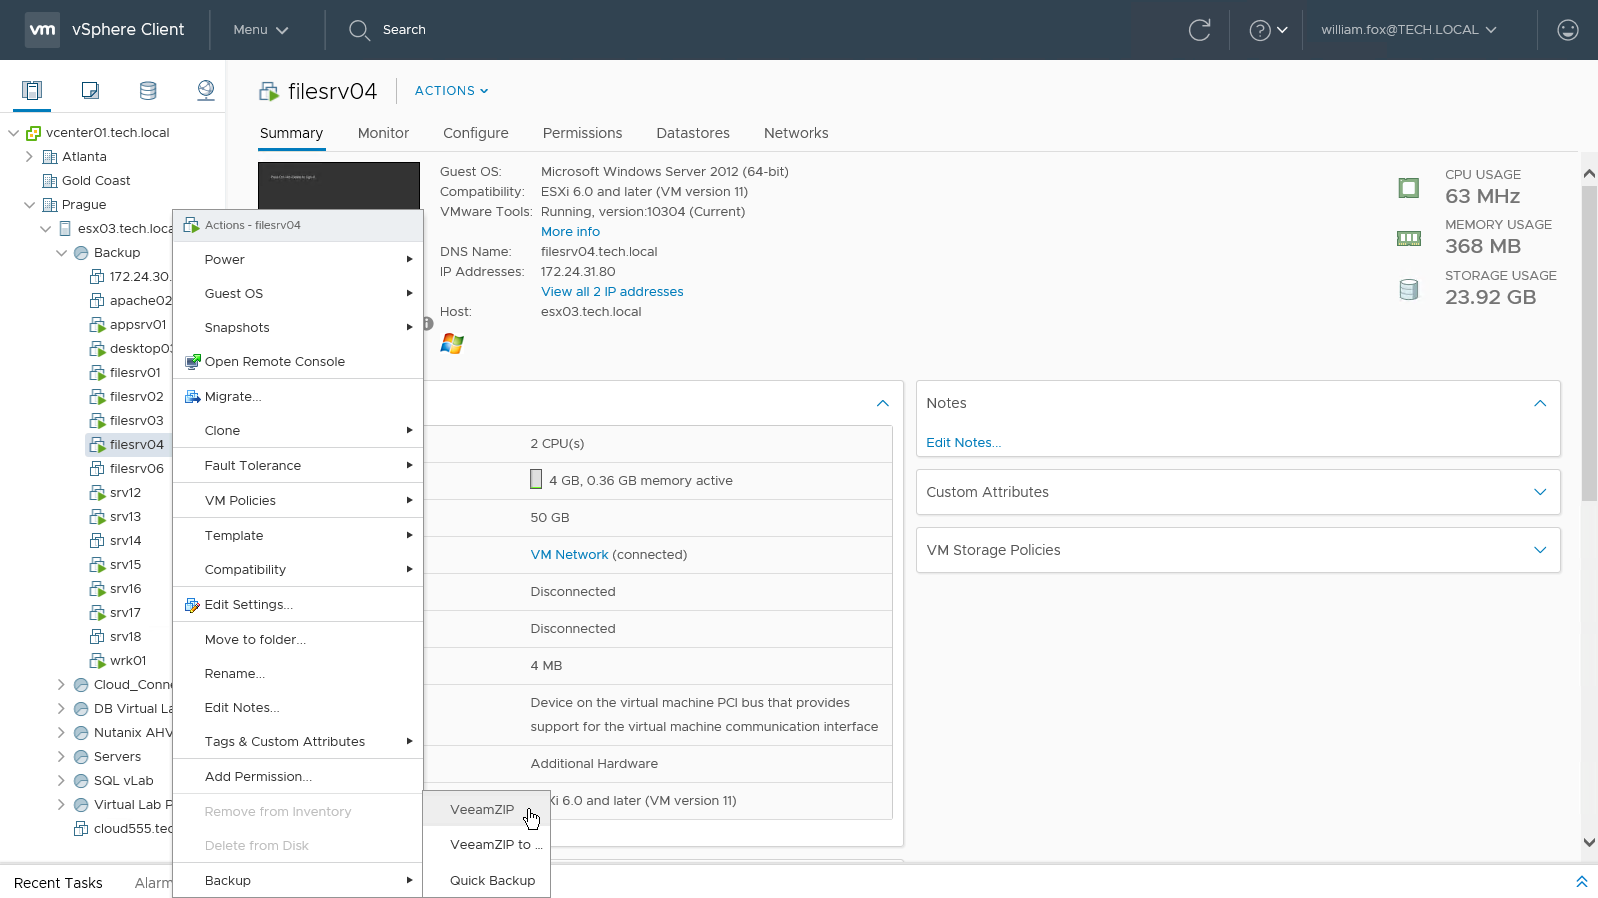
- Select Backup > VeeamZIP to if you want to create a backup with new VeeamZIP settings. Alternatively, use the Actions > Backup > VeeamZIP to option.
If you select this option, Veeam plug-in will display the VeeamZIP to window offering to specify VeeamZIP settings. Specify settings in the same way as described in the Configuring VeeamZIP Settings section and click VeeamZIP. Veeam will save the specified settings as default settings for VeeamZIP backup and start the VeeamZIP backup process.
You can view the backup creation progress in the Recent Tasks pane of vSphere Client.
Note |
A VeeamZIP backup job fails to start if the Location property of the VM and backup repository do not match — for example, if you try to use a repository with location set to Sydney to back up a VM with location set to Helsinki. To read more about location settings, refer to the Veeam Backup & Replication User Guide. |