This is an archive version of the document. To get the most up-to-date information, see the current version.
Configuring REST API and Restore Portal on Separate Machine
To configure REST API and Restore Portal on a separate machine, do the following:
- Open the Veeam Backup for Microsoft 365 REST API component installation folder.
By default, Veeam Backup for Microsoft 365 REST API component is installed to the C:\Program Files\Veeam\Backup365 folder.
- Run the Veeam.Archiver.REST.Configurator.exe file.
The Veeam Backup for Microsoft 365 window opens.
- Configure REST API settings. For more information, see Configuring REST API Settings.
- Configure Restore Portal settings. For more information, see Configuring Restore Portal Settings.
- Click Apply.
- Click OK to close the Veeam Backup for Microsoft 365 window.
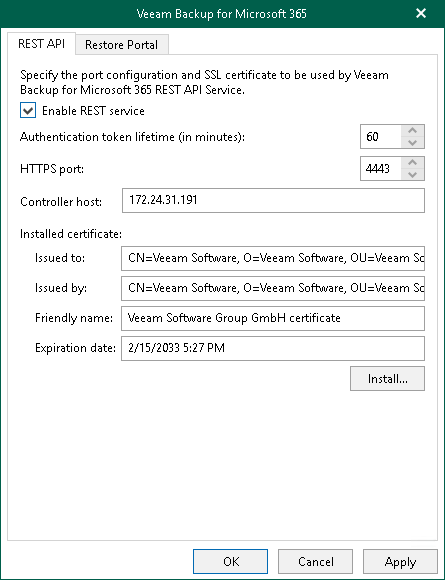
On the REST API tab, do the following:
- Select the Enable REST service check box.
- In the Authentication token lifetime field, specify the lifetime value for an authentication token (in minutes).
REST API authorization is based on the OAuth 2.0 Authorization Framework.
- In the HTTPS port field, specify a port number which Veeam Backup for Microsoft 365 use to access the Veeam Backup for Microsoft 365 RESTful API Service.
- In the Controller host field, specify a DNS name or IP address of the Veeam Backup for Microsoft 365 server.
- Click Install to specify an SSL certificate.
You can generate a new certificate or select an existing certificate using the Select Certificate wizard. For more information, see Installing SSL Certificates.
Note |
If you have generated a new self-signed certificate for restore operators, you must import the certificate for restore operators to the Trusted Root Certification Authorities certificate store on the separate machine with REST API installed. |
Configuring Restore Portal Settings
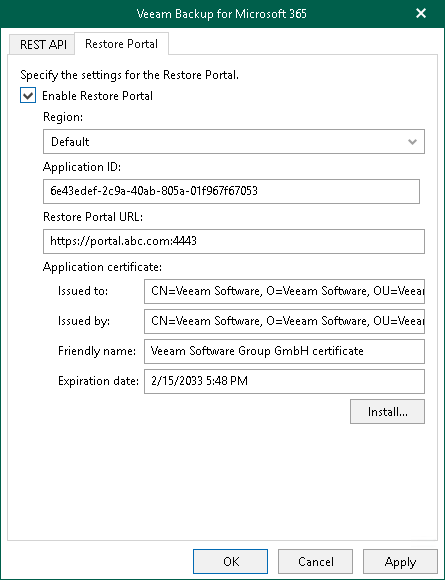
On the Restore Portal tab, do the following:
- Select the Enable Restore Portal check box.
- From the Region drop-down list, select a Microsoft Azure region.
Mind that if you change your Microsoft Azure region, you must also specify another Azure AD application.
- In the Application ID field, specify an identification number of Azure AD application that you want to use to access Restore Portal.
You can find this identification number in the application settings of your Azure Active Directory. For more information, see this Microsoft article. Make sure to manually grant the required permissions to your Azure AD application.
- In the Application certificate section, click Install to specify an SSL certificate that you want to use for data exchange between Restore Portal and the specified Azure AD application.
You can generate a new certificate or select an existing certificate using the Select Certificate wizard. For more information, see Installing SSL Certificates.
Note |
If you generated a new self-signed certificate for the specified Azure AD application, you must add this certificate in the application settings of your Azure Active Directory. |