S3 Compatible Settings
If you have selected to store backup files in the S3 compatible storage, specify the following settings:
The Account step of the wizard is available if you have chosen to save backup files in the S3 compatible storage.
|
NOTE |
|
You can store backups only in the S3 compatible storage repositories that are accessible over the HTTPs protocol. |
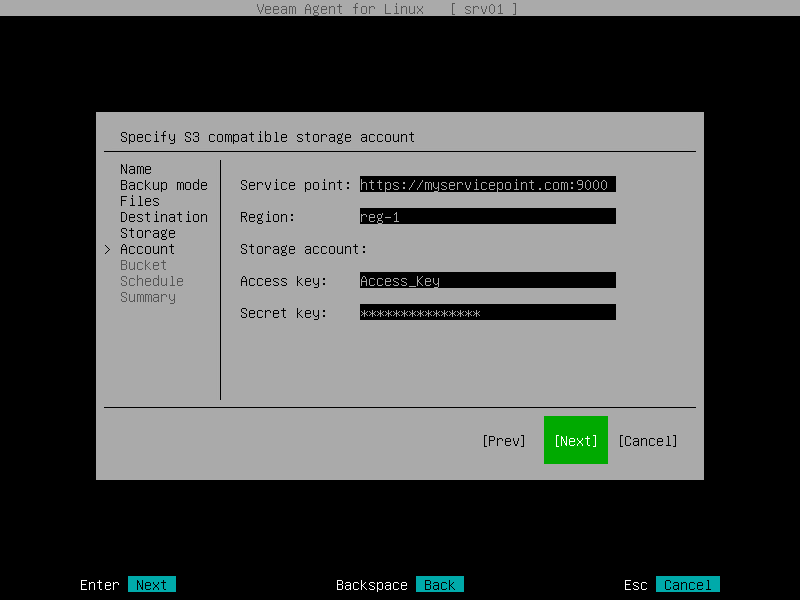
To connect to the S3 compatible storage, specify the following:
- In the Service point field, specify the address of your S3 compatible storage.
If you want to connect to the repository using an IPv6 address and port number, you must use the following format: IPv6:port, where:
- IPv6 is the IPv6 address of the object storage.
- port is the number of the port that Veeam Agent will use to connect to the object storage.
For example: https://2001-db8-1--bb8-c0b8-112.ipv6-literal.net:9000
If you want to connect to the repository using AWS PrivateLink for Amazon S3, use the following format: bucket.<VPС_endpoint_ID>.s3.<region>.vpce.amazonaws.com, where:
- VPС_endpoint_ID is the unique VPC endpoint ID that Veeam Agent will use to access the cloud storage.
- region is the AWS Region where the VPC endpoint and the S3 bucket are located.
For example: bucket.vpce-0abc123def456ghi7-01234567.s3.ap-northeast-1.vpce.amazonaws.com
To learn more about AWS PrivateLink for Amazon S3, see AWS Documentation.
- In the Region field, specify the storage region based on your regulatory and compliance requirements.
- In the Access key field, enter the access key ID.
- In the Secret key field, enter the secret access key.
The Bucket step of the wizard is available if you have chosen to save backup files in the S3 compatible storage and specified account settings to connect to the storage.
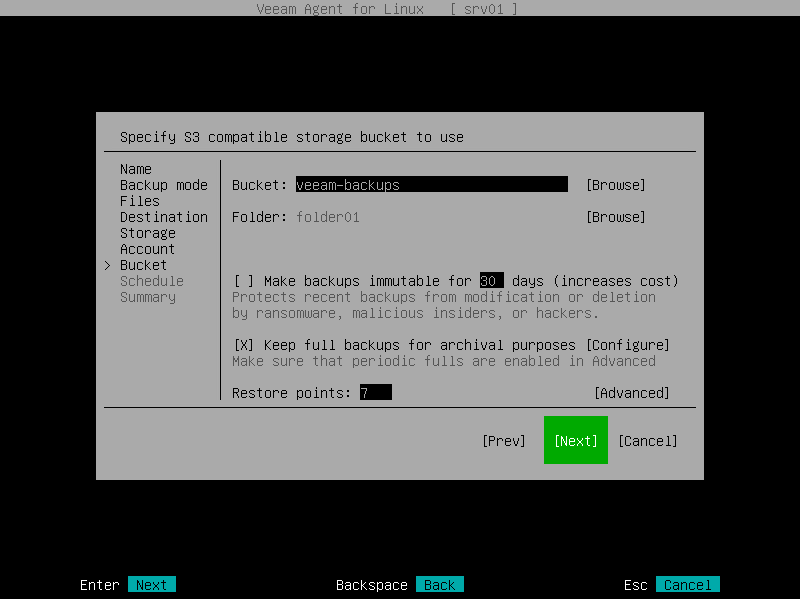
Specify settings for the bucket in the storage:
- In the Bucket field, specify a bucket in the storage:
- Select Browse with the [Tab] key and press [Enter].
- In the Specify Bucket window, select the necessary bucket and press [Enter].
- In the Folder field, specify a folder in the bucket:
- Select Browse with the [Tab] key and press [Enter].
- In the Specify Folder window, select the necessary folder and press [Enter].
|
TIP |
|
You can also create a new folder. To do this, type a name for the new folder in the Folder field. |
- Select the Make backups immutable check box to enable backup immutability and specify the immutability settings:
- Select For the entire duration of the retention policy if you want the immutability period to depend on the retention policy of a backup job. This option is selected by default when you enable immutability for a backup job.
|
IMPORTANT |
|
Consider the following:
For more information, see How Backup Immutability Works. |
- Select For the minimum duration if you want to specify a minimum immutability period manually. By default, Veeam Agent sets the period to 30 days.
In this case, backup job retention settings are not considered in the calculation of the immutability period.
- To use the GFS (Grandfather-Father-Son) retention scheme, select the Keep full backups for archival purposes check box and select Configure. In the Configure GFS window, specify how weekly, monthly and yearly full backups must be retained. For details, see Specify GFS Retention Settings.
|
NOTE |
|
If you use the GFS retention scheme and enable immutability for the backup, the restore points with GFS flags will become immutable for the whole GFS retention period. You will not be able to delete such restore points until the GFS retention period is over. |
- In the Retention policy field, specify the number of days for which you want to store backup files in the target location. After this period is over, Veeam Agent will remove from the backup chain any restore points that are older than the specified retention period. By default, Veeam Agent keeps backup files for 7 days. To learn more, see Short-Term Retention Policy.
- Select Advanced to specify additional backup job settings. For details, see Specify Advanced Backup Settings.
After that, Veeam Agent will create a new repository in the object storage where you can store backups.