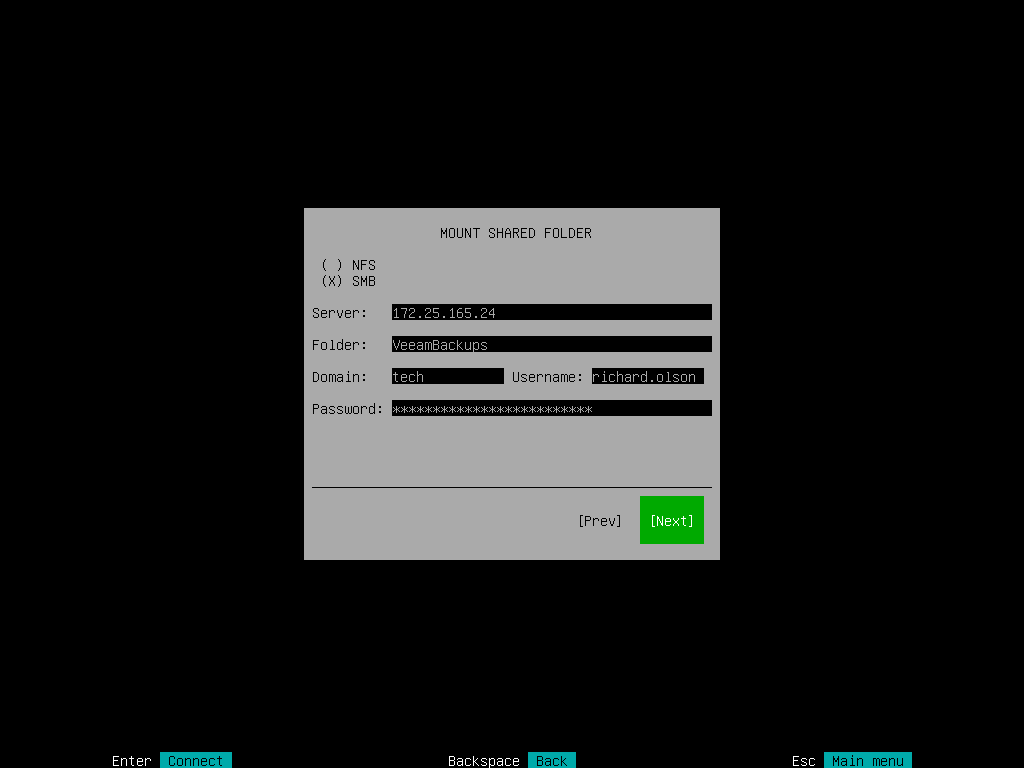
Shared Folder Settings
The Mount shared folder step of the wizard is available if you have selected to restore data from a backup file located in a network shared folder.
Specify settings for the network shared folder:
- Select the type of a network shared folder:
- NFS — to connect to a network shared folder using the NFS protocol.
- SMB — to connect to a network shared folder using the SMB (CIFS) protocol.
- In the Path field, specify the network shared folder name in the SERVER/DIRECTORY format: type an IP address or domain name of the server and the name of the network shared folder in which the backup file resides.
- [For SMB network shared folder] In the Domain field, type a name of the domain in which the account that has access permissions on the shared folder is registered, for example: DOMAIN.
- [For SMB network shared folder] In the Username field, type a name of the account that has access permissions on the shared folder.
- [For SMB network shared folder] In the Password field, type a password of the account that has access permissions on the shared folder.
- Press [Enter] to connect to the network shared folder. Veeam Agent will mount the specified network shared folder to the /media directory of the recovery image OS file system and display content of the network shared folder.
TIP |
You can mount several network shared folders to work with backup files that are stored in different locations if needed. To do this, return to the Select Backup Location step of the wizard and select the Add shared folder option once again. For every mounted location, Veeam Agent displays its name, type and mount point. You can view the list of mounted network shared folders and browse for a backup file located on the necessary storage. |
