Step 1. Boot from Veeam Recovery Media
To boot from the Veeam Recovery Media:
- [For CD/DVD/BD] Power on your computer. Insert the media with the recovery image to the drive and power off the computer.
[For removable storage device] Attach the removable storage device with the recovery image to your computer.
- Start your computer.
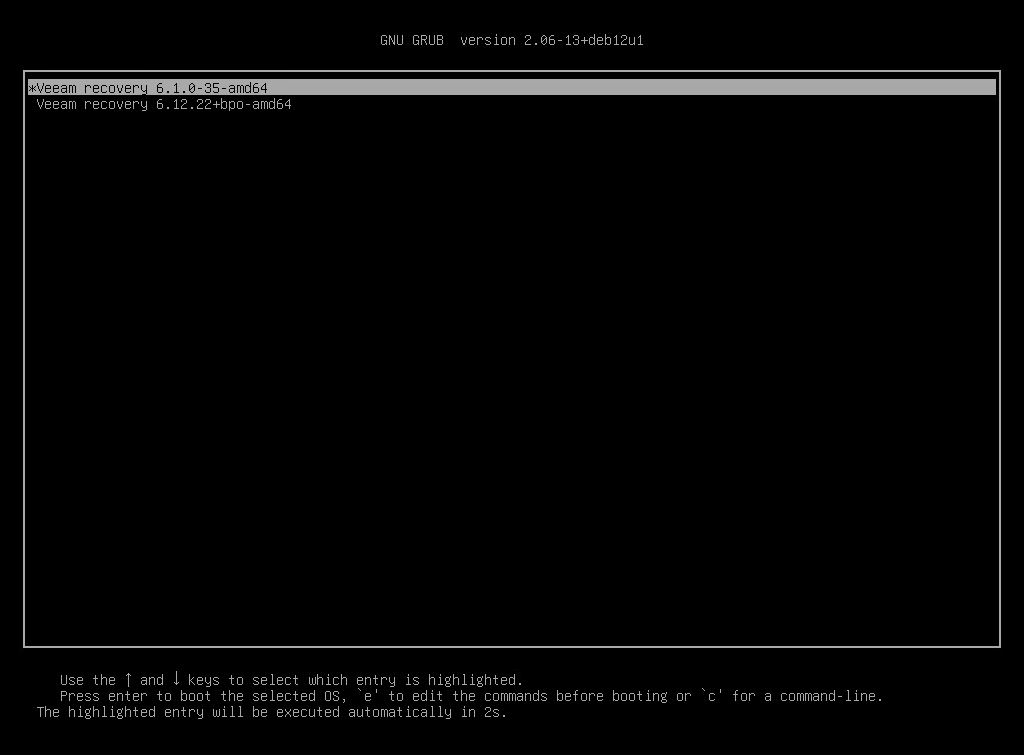
- If you boot from a regular recovery image, in the boot menu, select what Linux kernel version to use to boot your computer and specify boot options if necessary.
You can select a Linux kernel version if you use generic Veeam Recovery Media downloaded from the Veeam website or Veeam software repository. If you created a custom Veeam Recovery Media, you will be prompted to boot using the Linux kernel of your Veeam Agent computer included in the recovery image.
If you boot from a legacy recovery image, the boot menu is unavailable. After you start your computer, Veeam Agent will immediately start loading files from the Veeam Recovery Media.
|
TIP |
|
On legacy BIOS-based systems, the boot menu has a different interface but provides the same options. |
- Wait for Veeam Agent to load files from the Veeam Recovery Media.
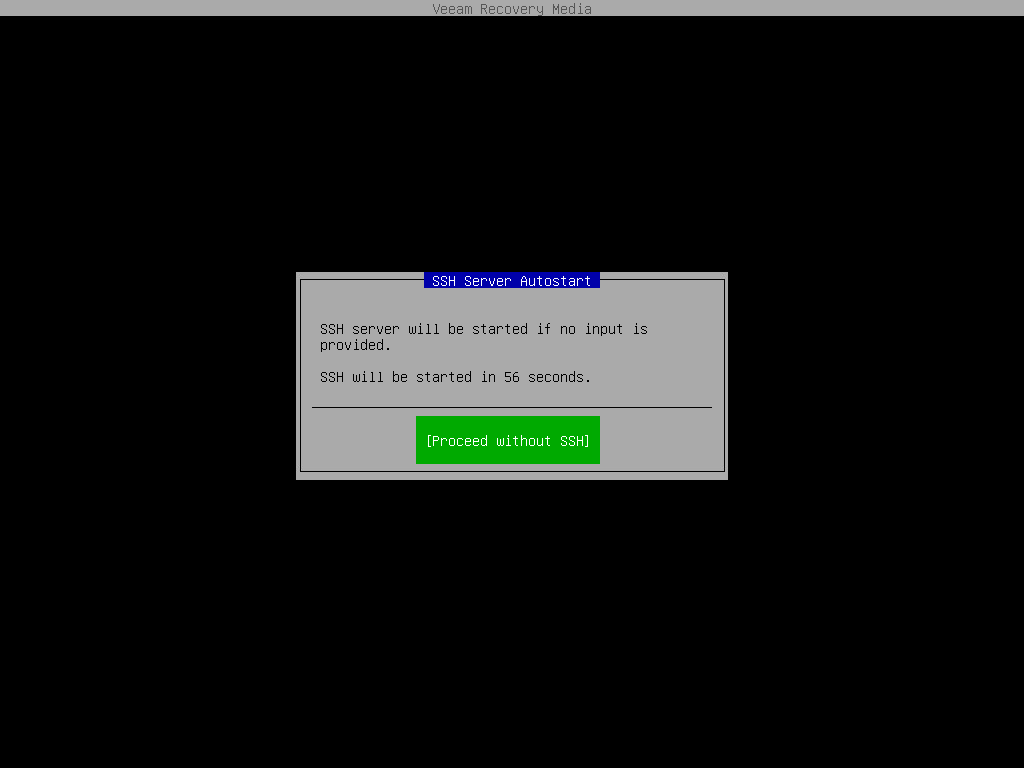
- After the recovery image OS has loaded, choose whether you want to start the SSH server. The SSH server allows you to connect to the Veeam Recovery Media from a remote machine.
The Veeam Recovery Media starts the SSH server automatically after a time-out. The default value for the time-out is 60 seconds.
If you do not want to start the SSH server, make sure that the Proceed without SSH button is selected and press [Enter]. You will proceed immediately to the step 7.
To override the default time-out and start the SSH server immediately, select the Start SSH now button using the [Tab] key and press [Enter].
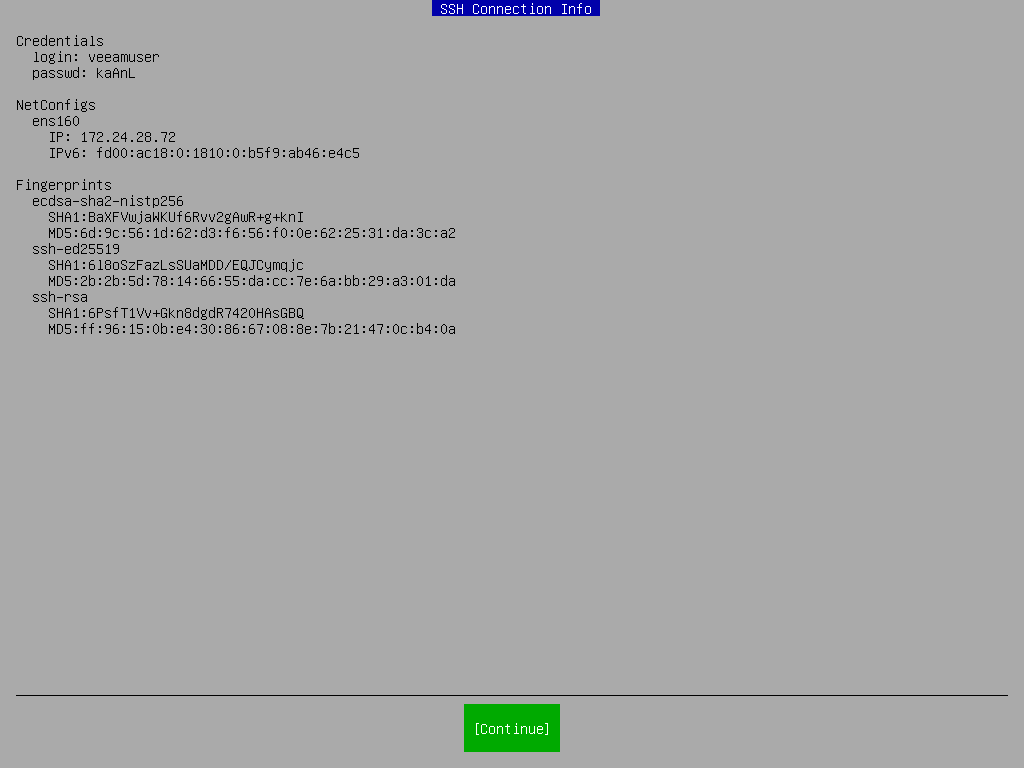
- After the SSH server has started, review settings to connect to the Veeam Recovery Media and press [Enter].
The Veeam Recovery Media displays the following connection settings:
- IP address of the computer booted from the Veeam Recovery Media
- User name and password of the account used to connect to the Veeam Recovery Media
- Fingerprints of the computer booted from the Veeam Recovery Media
|
NOTE |
|
The user name of the account used to work with the Veeam Recovery Media is veeamuser. If you want to use command-line utilities built in the regular recovery image, use the sudo command to provide the veeamuser account with privileges of the root account. |
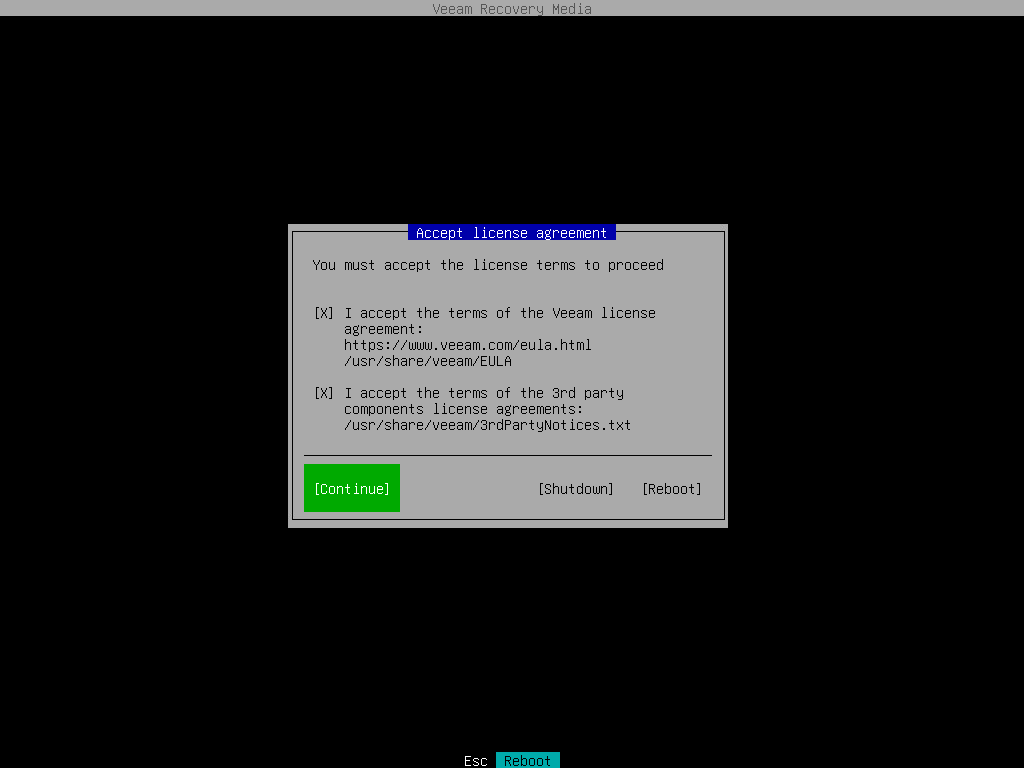
- Accept the terms of the product license agreement and license agreements for third-party components of the product:
- Make sure that the I accept Veeam End User Software License Agreement option is selected and press [Space].
- Select the I accept the terms of the following 3rd party software components license agreements option with the [Tab] key and press [Space].
- Switch to the Continue button with the [Tab] key and press [Enter].
- Make sure that network settings are specified correctly and configure the network adapter if necessary. To learn more, see Configure Network Settings.
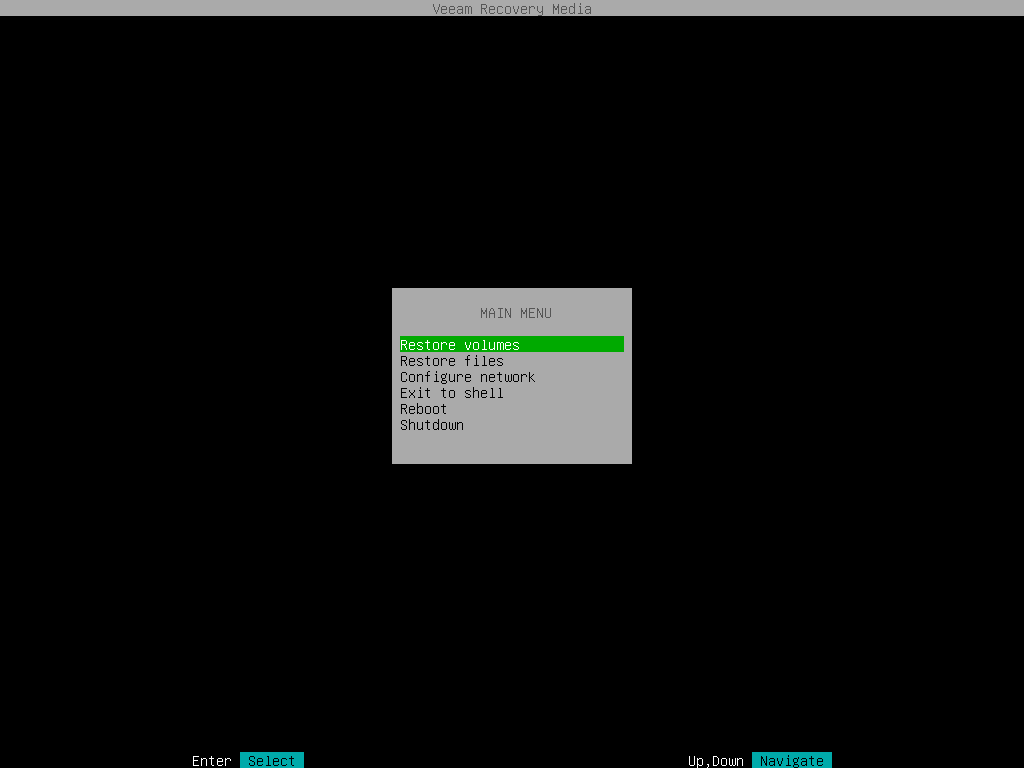
- Choose the necessary recovery option. Veeam Agent offers the following tools:
- Restore volumes — the Veeam Recovery wizard to recover data on the original computer or perform bare metal recovery.
- Restore files — the File Level Restore wizard to restore files and folders to the original location or to a new location.
- Exit to shell — Linux shell prompt with standard utilities to diagnose problems and fix errors.
|
TIP |
|
To stop working with the Veeam Recovery Media and shut down or restart your computer, in the Veeam Recovery Media main menu, select the Reboot or Shutdown option and press [Enter]. |