Creating Custom Veeam Recovery Media with Control Panel
To create custom Veeam Recovery Media with the Veeam control panel, do the following:
- Launch the Veeam Agent control panel with the veeam or veeamconfig ui command.
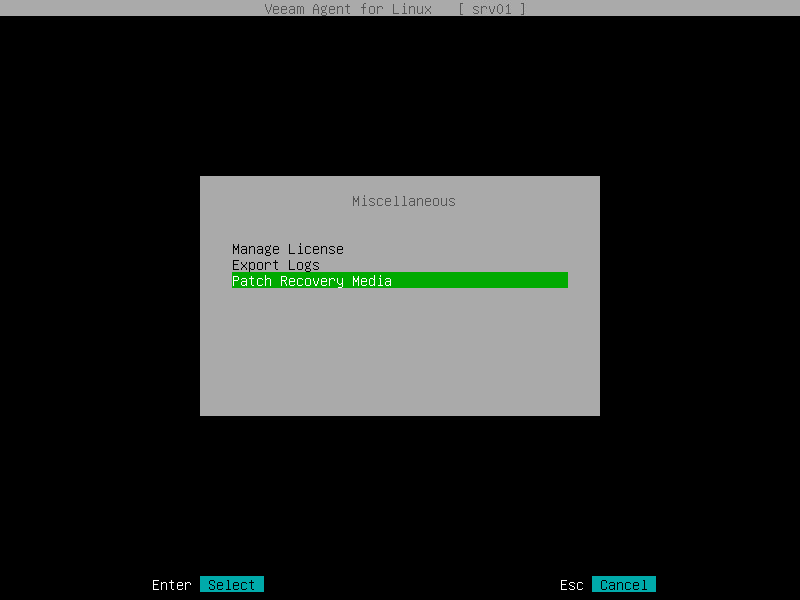
- In the Veeam Agent control panel, press the [M] key to open the Miscellaneous menu.
- In the menu, select the Patch Recovery Media option and press [Enter].
|
IMPORTANT |
|
Recovery Media patching is not supported by Veeam Agent for Linux on Power. |
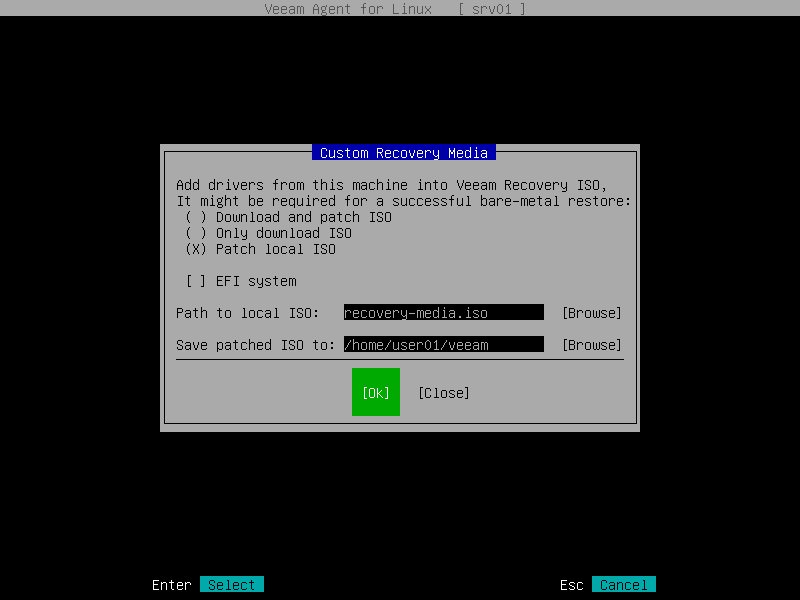
- Press [Tab] and select how you want to create a custom Veeam Recovery Media depending on the location of the generic recovery media ISO file:
- If you have not downloaded the generic Veeam Recovery Media, make sure that the Download and patch ISO option is selected and press [Tab]. If you select this option, Veeam Agent will download the ISO file of the generic Veeam Recovery Media from the Veeam software repository to the directory of your choice on the Veeam Agent computer and use this image to create the custom Veeam Recovery Media.
Veeam Agent downloads the Veeam Recovery Media ISO file depending on the Veeam Agent computer architecture. For details, see Veeam Recovery Media Versions.
- If you want only to download the generic Veeam Recovery Media, select the Only download ISO option with the [Down] key and press [Tab]. If you select this option, Veeam Agent will download the ISO file of the generic Veeam Recovery Media from the Veeam software repository to the directory of your choice on the Veeam Agent computer. You can use the downloaded ISO file later to boot your Veeam Agent computer or to create a custom Veeam Recovery Media.
Veeam Agent downloads the Veeam Recovery Media ISO file depending on the Veeam Agent computer architecture. For details, see Veeam Recovery Media Versions.
- If you have already downloaded the generic Veeam Recovery Media to a local directory on the Veeam Agent computer or to a network shared folder, select the Patch local ISO option with the [Down] key and press [Tab]. If you select this option, Veeam Agent will use the generic Veeam Recovery Media ISO file to create the custom Veeam Recovery Media.
The name of the generic Veeam Recovery Media ISO file depends on the recovery image version, Veeam Agent computer architecture and the source from which you downloaded the ISO file: from the product download page or Veeam software repository. To learn more, see Veeam Recovery Media Versions.
- If you selected the Download and patch ISO or Patch local ISO option, the EFI system option is available. If you want to boot the Veeam Recovery Media on EFI-based systems, select the EFI system option with the [Tab] key and press [Space].
If you do not enable this option, the custom Veeam Recovery Media will be able to boot on BIOS-based systems only.
- If you selected the Patch local ISO option, in the Path to local ISO field, specify a path to the ISO file of the generic Veeam Recovery Media:
- Select the Browse option with the [Tab] key and press [Enter].
- In the Path to ISO window, select the necessary directory and press [Enter].
- Repeat the step 'b' until a path to the directory in which the recovery media ISO file resides appears in the Current directory field.
- In the directory where the recovery media ISO file resides, select the ISO file and press [Enter].
- Specify a path to the resulting ISO file of the Veeam Recovery Media.
If you selected the Download and patch ISO or Patch local ISO option, in the Save patched ISO to field, you can specify a path to the resulting ISO file of the custom Veeam Recovery Media; if you selected the Only download ISO option, in the Save ISO to field, specify a path to the resulting ISO file of the generic Veeam Recovery Media:
- Select the Browse option with the [Tab] key and press [Enter].
- In the Save patched ISO to window, select the necessary directory and press [Enter].
- Repeat step 'b' until a path to the directory where you want to save the resulting custom recovery media ISO file appears in the Current directory field.
- Select the OK button with the [Tab] key and press [Enter].
- To start the custom recovery media creation process, select the Next button with the [Tab] key and press [Enter].
Related Topics
Related Tasks