Step 1. Import Veeam Management Packs and Upgrade VE Service, Web UI and Veeam VMware Collector
To upgrade Veeam MP for VMware components on the Management Server:
- Log in to the machine where the Management Server is installed using an account with the local Administrator rights.
- Mount the installation image. The setup will open the splash screen with the installation options.
- On the splash screen, click Upgrade.
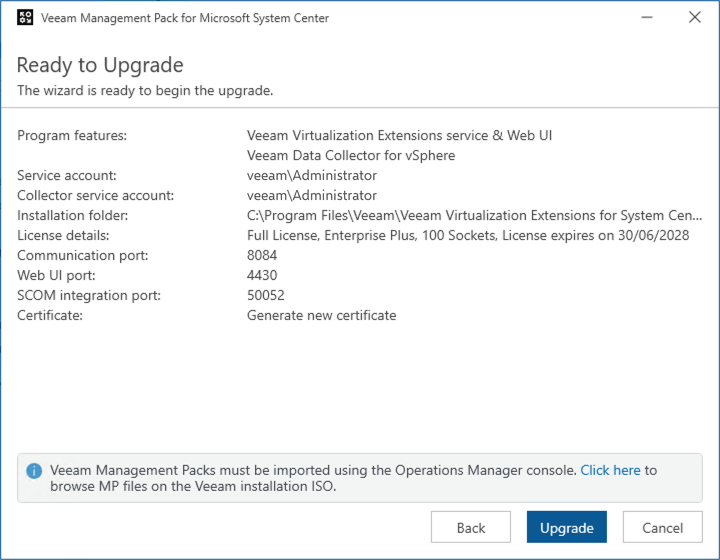
- Complete the Veeam Management Pack Setup wizard:
- At the License Agreement step, read and accept the license agreement. If you reject the agreement, you will not be able to continue installation.
- At the Upgrade step, review the Veeam MP for VMware components installed on the server.
Note
If you are upgrading Veeam MP for VMware components separately, you must first import Veeam management packs, and then install the VE Service and Veeam Data Collectors for vSphere.
- At the License step, browse to a local folder on your workstation to locate the license file provided to you by Veeam. To do that, click Browse to local license file.
Note that you will not be able to continue installation without providing a license.
- At the Service Account step, enter credentials of an account under which the Veeam Virtualization Extensions Service will run. The account must be a member of the local Administrators group. The user name must be specified in the DOMAIN\USERNAME or DOMAIN\USERNAME@DOMAIN format.
For more information on accounts and privileges, see Required Permissions.
Tip
By default, the Veeam VMware Collector service will run under an account that differs from the VE Service account. However, it is recommended that you use the same account.
- [This step applies only if you have not selected the Use the same account for Veeam VMware Collector service check box at the Service Account step] At the Data Collector Service Account step, enter credentials of an account under which the Collector services will run. The account must be a member of the local Administrators group. The user name must be specified in the DOMAIN\USERNAME or DOMAIN\USERNAME@DOMAIN format.
For more information on accounts and privileges, see Required Permissions.
Note
After you click Next, the setup wizard will run the system configuration check and will automatically install the missing ASP.NET Core Runtime and .NET runtime components (if any).
- At the Port Configuration step, customize ports used by Veeam MP for VMware. For the full description of ports and their default values, see Network Protocols and Ports.
- At the Certificate Selection step, choose a TLS certificate that will be used to secure traffic between the web UI and a web browser. Veeam MP offers the following options: use an existing TLS certificate located in the certificate store, or keep the default self-signed TLS certificate that will be generated during installation (this is the recommended option).
- At the Ready to Install step, click Install to begin installation.