Step 3. Choose Files and Folders to Archive
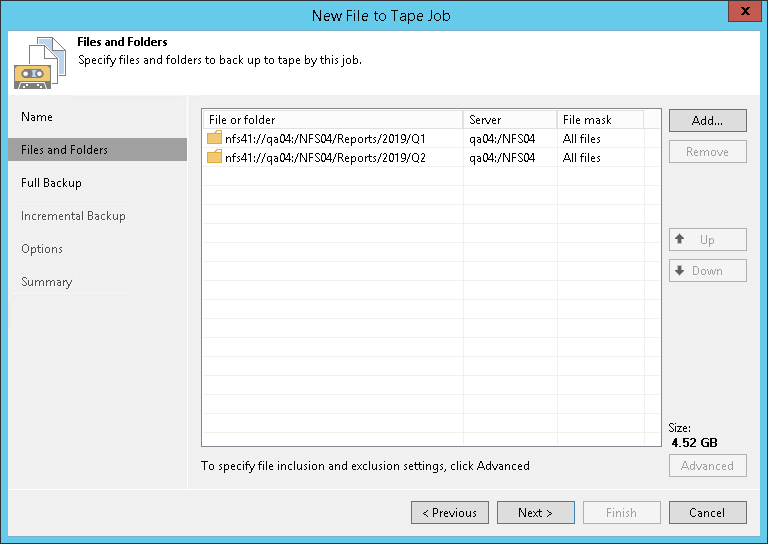
At the Files and Folders step of the wizard, select files and folders that you want to back up.
- Click Add.
- From the Server drop-down list, select a data source where the necessary files or folders reside:
- If you plan to back up files and folders from a Windows or Linux server, make sure it is added as a managed server to the backup infrastructure. For details, see Adding Microsoft Windows Servers and Adding Linux Servers.
- If you plan to back up files and folders from an SMB or NFS share, make sure it is added as a file share to the inventory. For details, see Adding File Share.
- If you plan to back up files and folders from a device supporting the NDMP protocol, make sure it is added as an NDMP server to the tape infrastructure. For details, see Adding NDMP Servers.
The account you use to access the target server must have read permissions for the folder and all its child folders.
- In the Folders tree, select folders you want to backup.
To select multiple folders, hold [Ctrl] and click necessary folders. Although different folders of the same share form separate records in the table, they will be processed by one job task.
Note |
On an NDMP server, you can select only volumes. You cannot back up separate files or folders. Also, you cannot use file masks. |
- In the Files and Folders screen, use the Up and Down buttons on the right to move sources up or down. The sources of the job are processed in the order in which the list displays them.
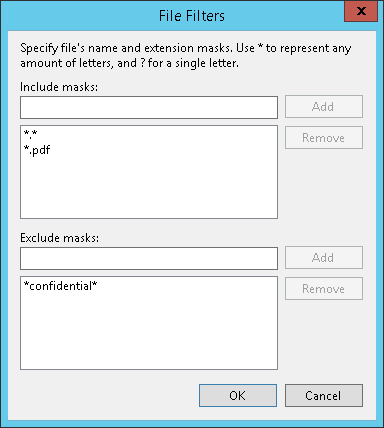
If you add a folder to the job, all the folder contents will be processed. If necessary, you can choose only specific files from the added folder. To do so, select a folder in the list and click Advanced. In the File Filters window, use Include masks and Exclude masks fields to filter the folder contents. You can use exact file names or create name masks (for example, *.EVT or *.PDF).