Installing from Veeam Hardened Repository ISO
The Veeam Hardened Repository ISO is delivered as bootable ISO which can be downloaded here. You can use a remote console or create a bootable USB stick from the ISO. Before you start, see Requirements and Limitations.
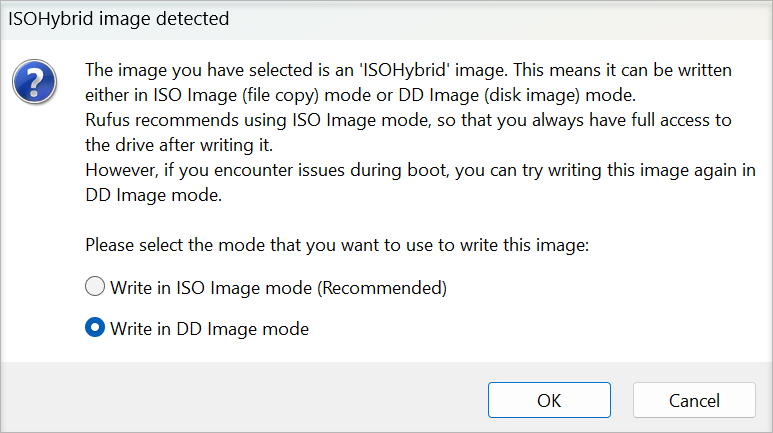
To create a bootable USB stick, it is recommended that you use Rufus with the default settings. Note that you need to select Write in DD Image mode option.
To install a hardened repository, on the boot screen, select Install Hardened Repository. Then, do the following:
- On the Keyboard screen, add your preferred keyboard layouts.
- On the Time and Date screen, set your time zone and specify any NTP or NTS servers you want to use.
- On the Network & Host Name screen, specify a hostname or leave it empty. Then, configure your network interface.
If you use a single network interface, do the following:
- Select the network interface and click Configure.
- In IPv4 or IPv6 settings, specify your IP address and DNS. A static IP address should be used if possible.
- Click Save.
If you use multiple network interfaces without failover, do the following:
- Select a network interface. Enable it with the toggle if necessary. Click Configure.
- In IPv4 or IPv6 settings, specify your IP address and DNS. A static IP address should be used if possible.
- In the General tab, select the Connect automatically with priority check box.
- Click Save.
Repeat this process for any additional network cards.
If you use multiple network interfaces with failover, do the following:
- Select a network interface. Enable it with the toggle if necessary. Click Configure.
- In the General tab, select the Connect automatically with priority check box. Repeat this step for each network interface.
- Click the plus icon. In the drop-down menu, select Bond.
- Specify a name for the connection and the interface.
- Click Add.
- In the drop-down menu, select Ethernet as the connection type. Then, select the network interface and click Save. Repeat this step for each network interface.
- Select the bonding mode: Round Robin (EtherChannel without LACP), 802.3ad (EtherChannel with LACP) or Active-backup (for other configurations).
- Click Save.
- Select the bond and click Configure.
- In IPv4 or IPv6 settings, specify your IP address and DNS. A static IP address should be used if possible.
- Click Save.
- Click Begin Installation. After the process finishes, remove the media and reboot the system.