Configuring SSO for AD FS
To configure SSO authentication on the AD FS server side:
- Add an AD FS IdP as described in the Managing Identity Providers section.
- On the AD FS server, run AD FS Management.
- Right click on the Relying Party Trusts folder and select Add Relying Party Trust.
The Add Relying Party Trust Wizard will open.
- At the Welcome step of the wizard, click Start.
- At the Select Data Source step of the wizard, select the Import data about the relying party from a file option.
In the Federation metadata file location field, provide the path to the Veeam Service Provider Console metadata file downloaded at step 1.

- At the Specify Display Name step of the wizard, specify a name of the connection to Veeam Service Provider Console.
- Follow the other steps of the wizard without changing any values and click Close.
The Edit Claim Rules window will open.
- Click Add Rule.
The Add Transform Claim Rule Wizard will open.
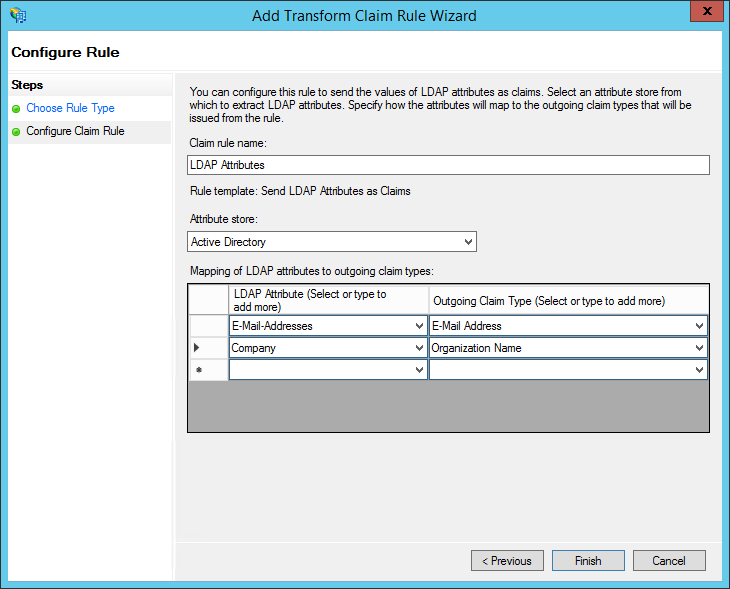
- At the Choose Rule Type step of the wizard, from the Claim rule type drop-down list, select Send LDAP Attributes as Claims.
- At the Configure Claim Rule step of the wizard, specify the rule settings:
- In the Claim rule name field, specify a rule name.
- From the Attribute store drop-down list, select Active Directory.
- In the Mapping of LDAP attributes to outgoing claim types table, from the drop-down lists in the left column, select E-Mail-Addresses and Company. In the right column, specify names of related claims that will be used to configure mapping rules in Veeam Service Provider Console.
- Click Finish.
- Click Add Rule.
The Add Transform Claim Rule Wizard will open.
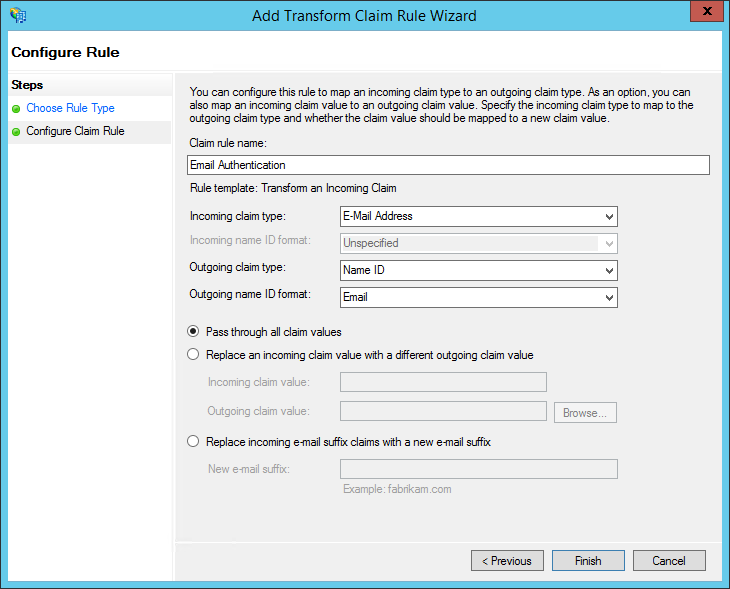
- At the Choose Rule Type step of the wizard, from the Claim rule type drop-down list, select Transform an Incoming Claim.
- At the Configure Claim Rule step of the wizard, do the following:
- From the Incoming claim type drop-down list, select E-mail Address.
- From the Outgoing claim type drop-down list, select Name ID.
- From the Outgoing name ID format drop-down list, select Email.
- Click Finish.
- Click Apply and then click OK.