Installing Veeam Backup Agents
You can install Veeam backup agents on ConnectWise Automate discovered computers from ConnectWise Automate Control Center.
Prerequisites
Before you install Veeam backup agents from ConnectWise Automate Control Center, make sure that:
- You have configured integration with at least one company in Veeam Service Provider Console. For details, see Configuring Companies Integration.
- You have installed ConnectWise Automate Agent on client computers. For details, see ConnectWise Automate Documentation.
- Client computers are configured to allow installation:
- The File and Printer Sharing (SMB-In) firewall rule must allow inbound traffic.
- The Remote Scheduled Tasks Management (RPC and RPC-EPMAP) rules must allow inbound traffic.
- You have an account with local Administrator permissions on all client computers, on which you want to install Veeam backup agents.
- This account will be used to upload Veeam backup agent setup files to client computers and perform installation.
- If you plan to assign a backup policy as part of the installation procedure, create a new backup policy or check and if necessary customize one of the predefined policies.
- For details, see Configuring Backup Policies.
Installing Veeam Backup Agents
To install Veeam backup agents on ConnectWise Automate discovered computers:
- Log in to ConnectWise Automate Control Center.
The account used to access ConnectWise Automate must have the necessary permissions. For details, see section Permissions of the Deployment Guide.
- In the menu on the left, click Browse.
- On the Clients tab, expand Clients and double-click the name of a company or location integrated with Veeam Service Provider Console.
- In the pop-up window, navigate to the Veeam Service Provider Console > Discovered Computers tab.
Veeam Service Provider Console will display the list of all computers managed by a mapped client in ConnectWise Automate.
- Choose one or more computers on which you want to install Veeam backup agents.
To select multiple computers, press and hold the [Ctrl] key.
Use Filter in the upper menu to choose what filters you want to enable. You can filter computers by Connection status, Platform type, Agent status, Agent version or Activation.
- At the top of the list, click Install Backup Agent.
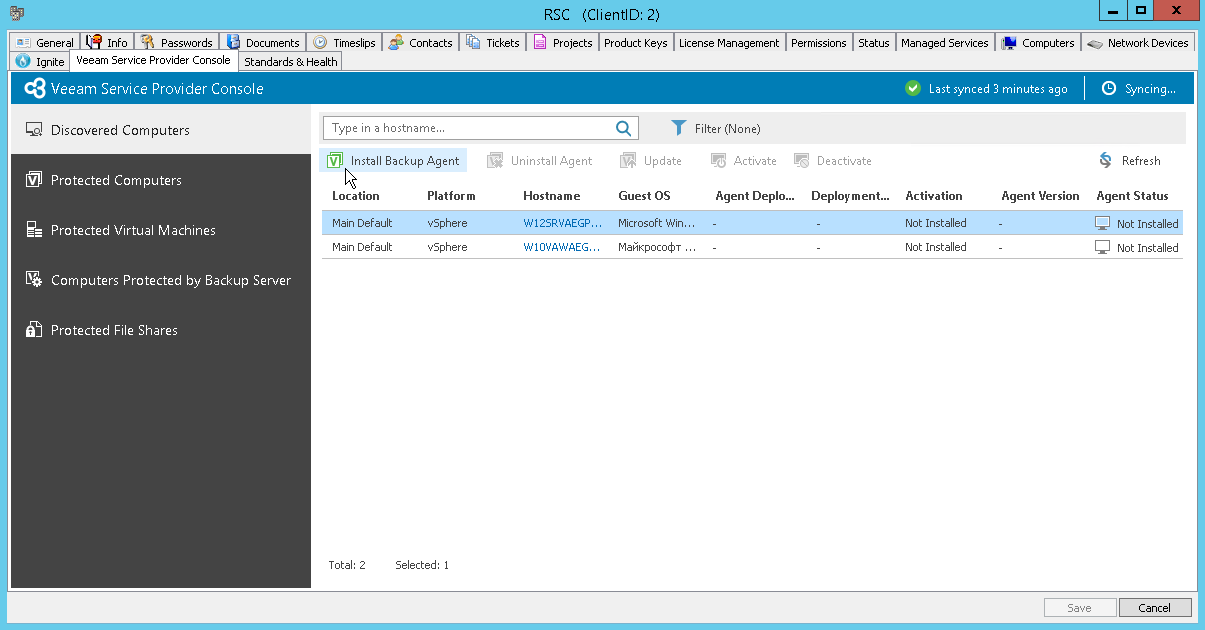
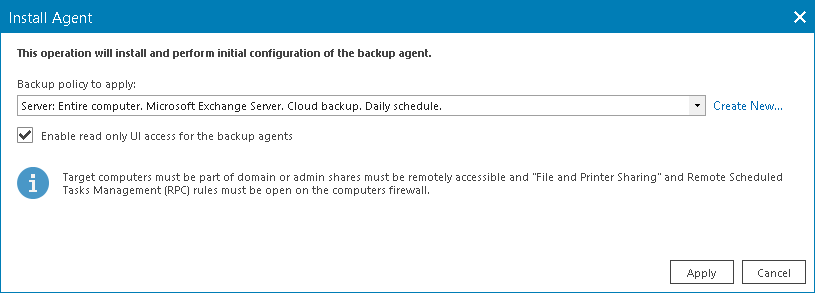
The Install Agent window will pop up.
- In the Backup policy to apply list, choose a backup policy that must be applied as part of the installation process.
If you allocated all cloud resources specified in the policy to the company, the chosen backup policy will be used to configure backup job settings after installing Veeam backup agents. You can select No policy if you do not want to configure backup job settings as part of installation.
To configure a new backup policy, click Create New and configure a new backup policy in Veeam Service Provider Console interface. For details, see Configuring Backup Policies.
- By default, the read-only access mode is disabled for all Veeam backup agents. To enable the read-only access mode for Veeam backup agents, select the Enable read only UI access for the backup agent check box.
For details on the read-only access mode for Veeam backup agents, see Enabling Read-Only Access Mode.
- Click Apply.
- [For VMware Cloud Director company accounts] In the VCD credentials required window specify user name and password for VMware Cloud Director organization administrator account and click OK.
Alternatively, you can create a VMware Cloud Director subtenant account and use credentials for this account to deploy Veeam backup agents. For details on creating VMware Cloud Director subtenants, see Creating Subtenants.
- Wait for the installation process to complete.
Checking Installation Results
To make sure that installation of Veeam backup agents has completed successfully, complete the following steps:
- Log in to ConnectWise Automate Control Center.
The account used to access ConnectWise Automate must have the necessary permissions. For details, see section Permissions of the Deployment Guide.
- In the menu on the left, click Browse.
- On the Clients tab, expand Clients and double-click the name of a company or location integrated with Veeam Service Provider Console.
- In the pop-up window, navigate to the Veeam Service Provider Console > Discovered Computers tab and find the necessary computers in the list.
- Check the value in the Deployment Status and Deployment Progress columns.
If installation was successful, the Deployment Status status must be Success, and the Deployment Progress must be 100%.
- Click a link in the Deployment Status column to display session details of the installation procedure.
In some cases, after installation you may need to perform additional operations. For example, if the setup detects a pending computer reboot, the list of installation session details will display a warning notifying that reboot is required. To complete the installation, you can initiate computer reboot in ConnectWise Automate Control Center.
For details, see ConnectWise Automate Documentation.
You can also initiate computer reboot in Veeam Service Provider Console. For details, see Rebooting Remote Computers.
