 This is an archive version of the document. To get the most up-to-date information, see the current version.
Step 8. Configure Network Settings
[This step applies only if you have selected the Restore to a new location, or with different settings option at the Restore Mode step of the wizard]
At the Network step of the wizard, you can configure specific network and mount target settings for the restored file system. To do that, select the file system and do the following:
- Click VPC and select VPC network to which the restored EFS file system will be connected.
For a VPC network to be displayed in the list of available networks, it must be created in AWS in the AWS Region specified at step 4 of the wizard, as described in AWS Documentation.
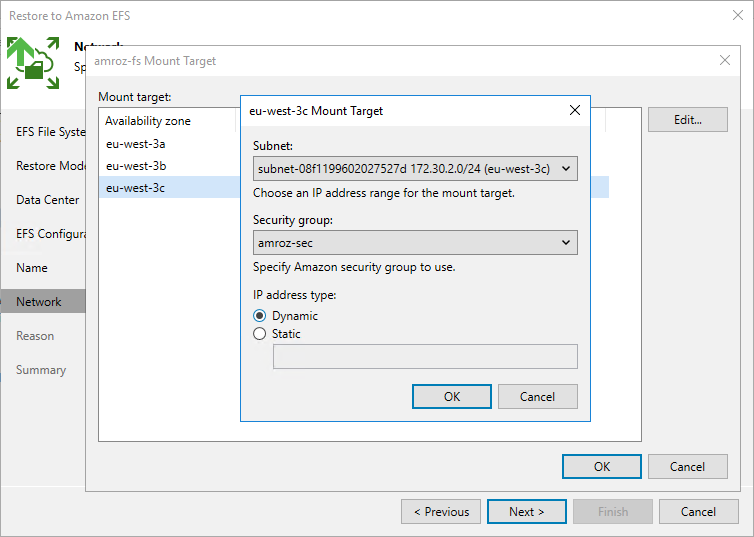
- Click Target, select an Availability Zone where the mount target will be created and click Edit. Then, in the Mount Target window:
- From the Subnet drop-down list, select a subnet to which the mount target will be connected.
For a subnet to be displayed in the list of available networks, it must be created in AWS as described in AWS Documentation.
- From the Security group drop-down list, select a security group that will be associated with the mount target.
For a security group to be displayed in the list of available groups, it must be created in AWS as described in AWS Documentation.
- In the IP address type section, choose whether you want Veeam Backup & Replication to assign a dynamic IP address to the mount target.
Note |
If you have selected the Regional storage class at step 6 of the wizard, it is required to configure at least one mount target for the restored EFS file system. |
