Step 1. Open File-Level Restore Portal
To open the file-level restore portal:
- Log in to Veeam Service Provider Console.
For details, see Accessing Veeam Service Provider Console.
- In the menu on the left, click Protected Data.
- Open the Computers tab and navigate to Managed by Console.
Veeam Service Provider Console will display a list of all managed Veeam backup agents.
- Select the necessary Veeam backup agent in the list.
To display all Windows agents, click Filter, in the Guest OS section select Windows and click Apply.
- Do one of the following:
- To perform restore on the selected computer, at the top of the list, click File-Level Restore.
Alternatively, you can right-click the necessary computer and choose File-Level Restore.
The file-level restore portal will open in a new tab.
- To restore files to a different computer or restore files from an orphaned backup:
- Click a link in the Backups column.
- In the Backups window, select the necessary backup job.
- At the top of the list, click File-Level Restore.
Alternatively, you can right-click the necessary backup job and choose File-Level Restore.
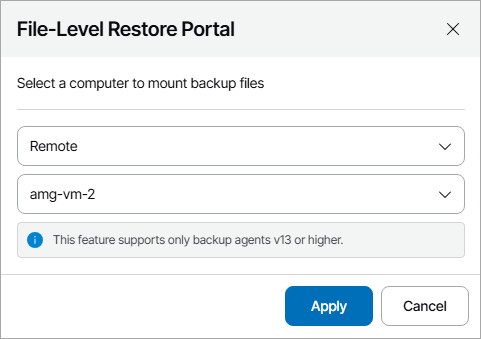
- In the File-Level Restore window, select a location and a remote computer on which you want to perform restore.
- Click Apply.
The file-level restore portal will open in a new tab.
|
Note: |
|
Restore to a different computer is available only for Veeam Agent for Microsoft Windows version 13 or later. |