This is an archive version of the document. To get the most up-to-date information, see the current version.
Step 4. Specify VM Size
At the VM Size step of the wizard, you can:
- Select a size and storage account for the restored machine
- Select disks to restore and change their type
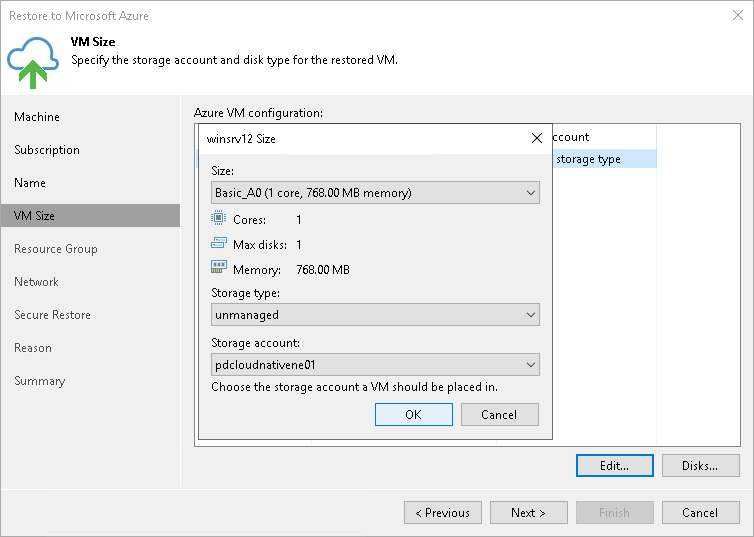
Selecting VM Size and Storage Account
To select a size and storage account for the machine:
- In the Azure VM Configuration list, select the machine and click Edit.
- From the Size drop-down list, select a size for the restored VM. By default, Veeam Backup & Replication selects the smallest VM size that can support the number of disks for the restored machine.
Make sure that you select the right VM size that corresponds to the initial machine configuration. The VM size affects the number of CPU cores, memory and disk resources that will be allocated to the restored machine. For more information, see Microsoft Docs.
- From the Storage account drop-down list, select a storage account whose resources you want to use to store disks of the restored machine. The storage account must be compatible with the VM size you select.
The list of storage accounts contains only general purpose storage accounts. Blob storage accounts are not be displayed in the list of subscriptions. For more information about account types, see Microsoft Docs.
If you select a premium storage account, make sure that the VM size is compatible with the selected account.
|
When restoring machines to Microsoft Azure, the storage accounts with the ZRS or GZRS replication options are not supported. For details, see Microsoft Docs. |
- From the Storage type drop-down list, select the managed or unmanaged disk type. Note the limitations for VM disk sizes in Before You Begin.
- Click OK.
|
Microsoft Azure subscriptions have default limits on the number of CPU cores. Make sure that the VM size you select does not exceed limits of the subscription. |
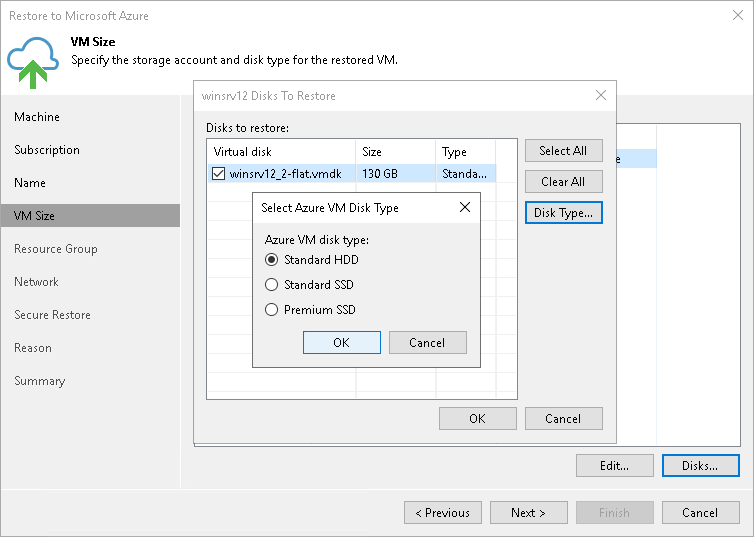
Selecting Disks to Restore and Changing Their Types
You can restore all disks or specific disks of a machine. You can also change disk types of the restored disks if you have selected the managed storage type.
To select specific disks and change their type, do the following:
- In the Azure VM Configuration list, select the machine and click Disks.
- In the Disks to restore window, check that check boxes next to disks that you want to restore are selected. Clear check boxes next to disks that you do not want to restore.
- [If you have selected the managed storage type] Select a disk and click the Disk Type button. In the Select Azure VM Disk Type window, select one of the following types: Standard HDD, Standard SSD or Premium SSD. For more information on disk types, see Microsoft Docs.
|
The selected disk type must be compatible with the selected VM size. |