Step 3. Specify Credentials
At the Credentials step of the wizard, specify authentication settings for the Microsoft Windows server. Veeam Backup & Replication uses the selected authentication method only for the initial connection to the server to deploy Veeam components. For all subsequent connections, authentication is performed using certificates.
- Select one of the two authentication methods:
- Connect using local administrator credentials — this method uses the standard Windows Kerberos authentication protocol. It is recommended for environments with Active Directory or where traditional authentication is required. For more information, see Kerberos Authentication.
From the Credentials list, select credentials for the account that has administrator privileges described in section Permissions. If you have not set up credentials beforehand, click the Manage accounts link or click Add on the right to add the credentials. For more information, see Credentials Manager.
Veeam Backup & Replication will use the provided credentials to deploy its components on the added server.
- Connect using a certificate-based authentication — select this option if you have pre-installed the Veeam Deployment Kit on the target server. With this method, no user name or password is required; authentication is performed using certificates. It is recommended for environments where Kerberos is disabled or unavailable, or for enhanced security. For more information, see Using Veeam Deployment Kit.
To use this option, ensure the Veeam Deployment Kit has been installed on the target Microsoft Windows server.
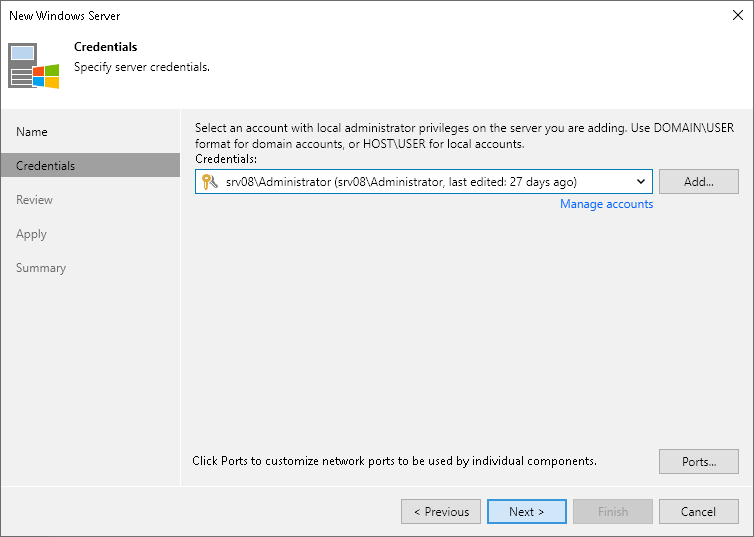
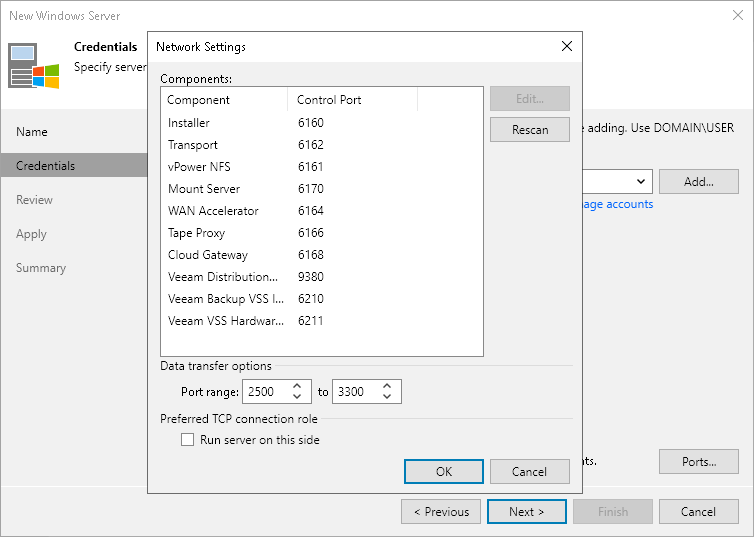
- To customize network ports used by Veeam Backup & Replication components, click Advanced network connection settings. For default ports used by the Veeam Backup & Replication components, see Ports.
If necessary, adjust the port numbers.
- In the Data transfer options section of the Network Settings window, specify connection settings for file copy operations. Provide a range of ports that will be used as transmission channels between the source server and target server (one port per task). By default, Veeam Backup & Replication uses port range 2500-3300.
If the virtual environment is not large and data traffic will not be significant, you can specify a smaller range of ports, for example, 2500-2509 to run 10 concurrent tasks at the same time. Note that Veeam Backup & Replication processes each VM disk as a separate task.
- [For Microsoft Windows server deployed outside NAT] In the Preferred TCP connection role section select the Run server on this side check box. In the NAT scenario, the outside client cannot initiate a connection to the server on the NAT network. As a result, services that require initiation of the connection from outside can be disrupted. With this option selected, you will be able to overcome this limitation and initiate a "client-server" connection — that is, a connection in the direction of the Microsoft Windows server.
The option applies if one of the following roles is assigned to the server: source VMware backup proxy in backup or replication scenarios, source repository in the backup copy scenario.