Step 3. Specify Linux Server
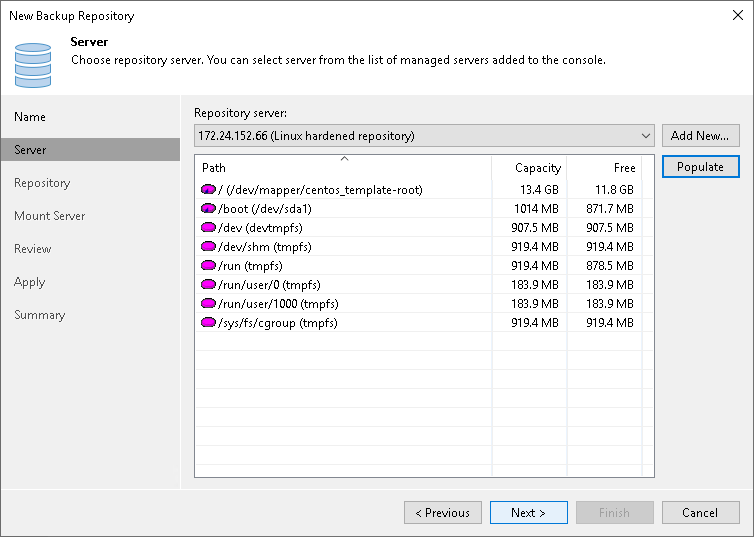
From the Repository server list, select a Linux server that you want to use as a hardened repository. Click Populate to see a list of disks connected to the server, their capacity and free space.

The Repository server list contains only those servers that are added to the backup infrastructure. If the server is not added to the backup infrastructure yet, click Add New on the right and follow the wizard:
- At the Name step of the wizard, specify a full DNS name or IP address and description of the Linux server. The default description contains information about the user who added the server, date and time when the server was added.
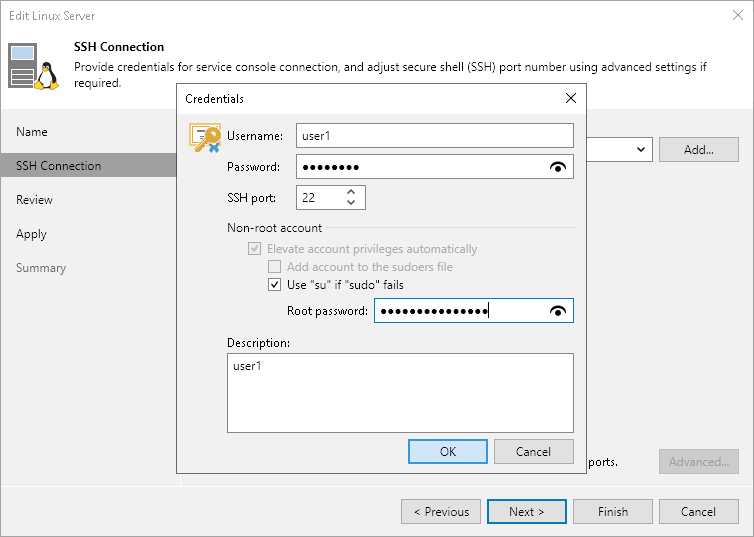
- At the SSH Connection step of the wizard, specify single-use credentials to connect to the Linux server and deploy Veeam Data Mover. Note that Veeam Backup & Replication does not store these credentials in the configuration database.
Note |
The user account you specified must be a non-root account. Also, it must have the home directory created on the Linux server. |
The Elevate account privileges automatically check box is used by default. If you did not add the user account to the sudoers file, select the Use "su" if "sudo" fails check box and enter the password for the root account. For more information on these check boxes, see Linux Accounts (User Name and Password).

Important |
If you added the user account to the sudoers file, you do not need to select the Use "su" if "sudo" fails check box and specify the root password. But after the server is added, you must remove the user account from the file. |
If you want to change default SSH settings, click Advanced. For more details, see Step 3. Specify Credentials and SSH Settings in the New Linux Server wizard.
- At the Review step of the wizard, review what Veeam Backup & Replication components are already installed on the server and what components will be installed. Click Apply to add the Linux server to the backup infrastructure.
- At the Summary step of the wizard, review details of the Linux server and click Finish to exit the wizard.