Step 4. Specify Name and Tags
At the Name step of the wizard, you can specify names and manage AWS tags for the restored workloads. By default, Veeam Backup & Replication uses the original workload names and adds the Original name and Restore start time tags.
To define a new name for a workload that will be restored:
- In the Machines to restore list, select a workload and click VM name.
- In the Change Name window, enter a new name explicitly or specify a change name rule — add a prefix and suffix to the original workload name.

You can use AWS tags to categorize instances in Amazon EC2. A tag is a label with metadata that includes two properties: a key and a value. For more information on AWS tags, see the AWS Documentation.
You can modify or delete these tags, or add new ones.
|
Note |
|
If you restore a workload from backups of an Amazon EC2 instance, Veeam Backup & Replication displays tags that were assigned to this instance. You can modify or delete these tags as well. |
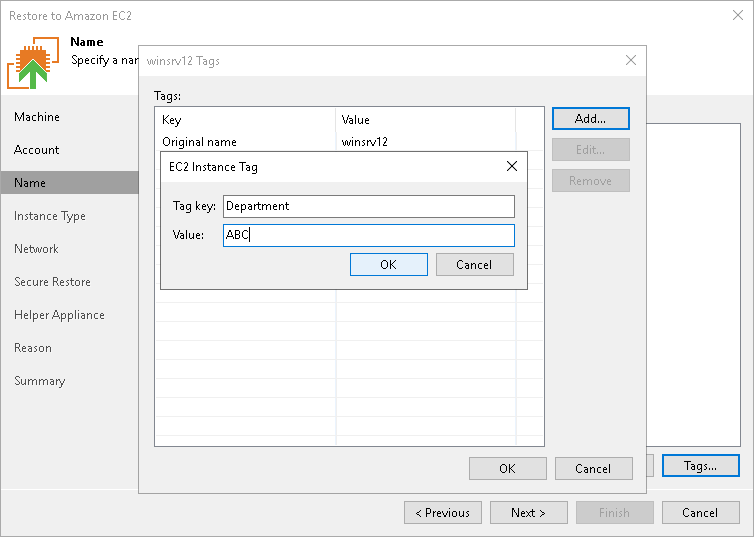
Adding Tag
To add a new tag:
- In the Machines to restore list, select a workload and click Tags.
- In the Tags window, click Add.
- In the EC2 VM Tag window, specify the Key and Value properties.
Note that you cannot add the tag with the Name key. Veeam Backup & Replication uses the Name tag to set the name for the restored EC2 instance in Amazon EC2.
Modifying Tag
To modify a tag:
- In the Machines to restore list, select a workload and click Tags.
- In the Tags window, select the necessary tag and click Edit.
- In the EC2 VM Tag window, edit the Key or Value properties.
Deleting Tag
To delete a tag:
- In the Machines to restore list, select a workload and click Tags.
- In the Tags window, select the necessary tag and click Remove.