Configuring SNMP Service Properties
To configure SNMP service properties on recipient systems:
- Install a standard Microsoft SNMP agent from the Microsoft Windows distribution on the computer.
- From the Start menu, select Control Panel > Administrative Tools > Services.
- Double-click SNMP Service to open the SNMP Service Properties window.
- Click the Traps tab.
- Add the public string to the Community name list and name of the necessary host to the Trap destinations list.

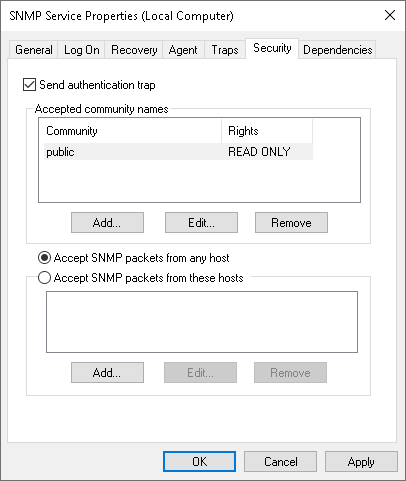
- Click the Security tab.
- Make sure the Send authentication trap check box is selected.
- Add the public string to the Accepted community names list.
- Select the Accept SNMP packets from any host check box.
- Click OK to save changes.