This is an archive version of the document. To get the most up-to-date information, see the current version.
Step 6. Specify Target Database
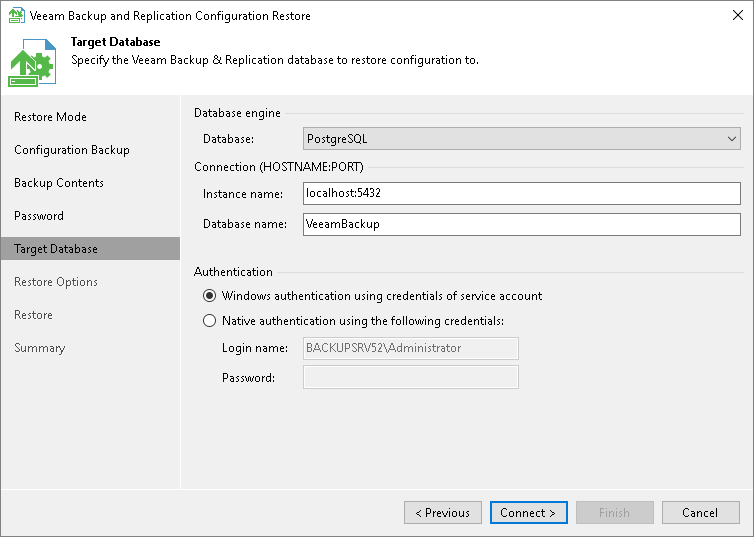
At the Target Database step of the wizard, specify the target Microsoft SQL Server instance to which configuration data must be restored.
- In the Database name field, specify a name of the database to which configuration data must be restored. By default, Veeam Backup & Replication uses the default name for the target database.
If you specify a name of an existing target database, Veeam Backup & Replication will overwrite this database. If you specify a name of the database that does not exist, Veeam Backup & Replication will create it on the specified Microsoft SQL Server instance.
Note |
If a backup repository is located in the backup server, after configuration restore, this repository will point to the same path as it was before the migration but in a new host. For example, if you keep backed-up data on the D disk, after migration Veeam Backup & Replication will keep new backups on the D disk of the new host. |
- From the Server name list, select a Microsoft SQL Server instance on which the database is deployed or must be deployed. In the list of Microsoft SQL Server instances, Veeam Backup & Replication displays all servers from the network where the backup server resides. To update the list of servers, click Refresh on the right.
- In the Authentication section, select the authentication mode to connect to the target Microsoft SQL Server instance: Windows Authentication or SQL authentication. If you select the SQL authentication mode, specify credentials of the Microsoft SQL Server account that you want to use.
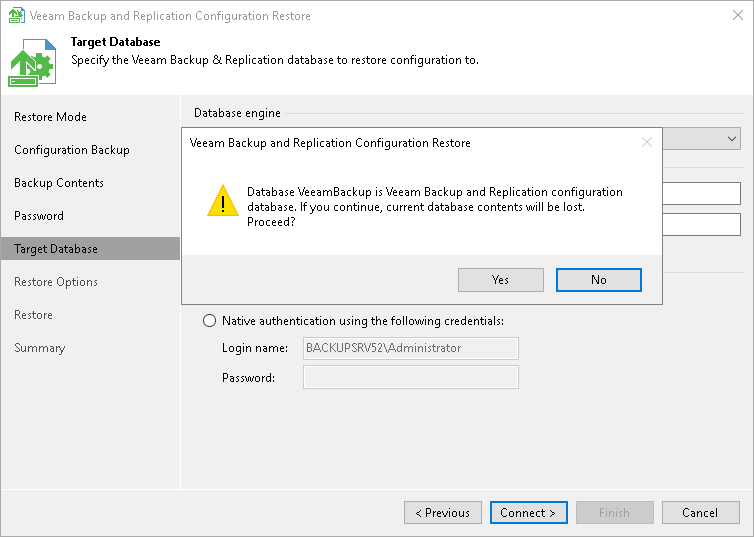
When you restore configuration to an existing database, the configuration restore process will delete the current state of the database contents and replace it with the restored data. Veeam Backup & Replication will display a warning. If you want to replace the contents, click Yes to confirm.
If you do not want to lose the current data, restore the configuration to a new database. To do this, click No to the warning and specify a non-existing database name in the Database name field.