Configuring Users Using Web UI
Adding Users
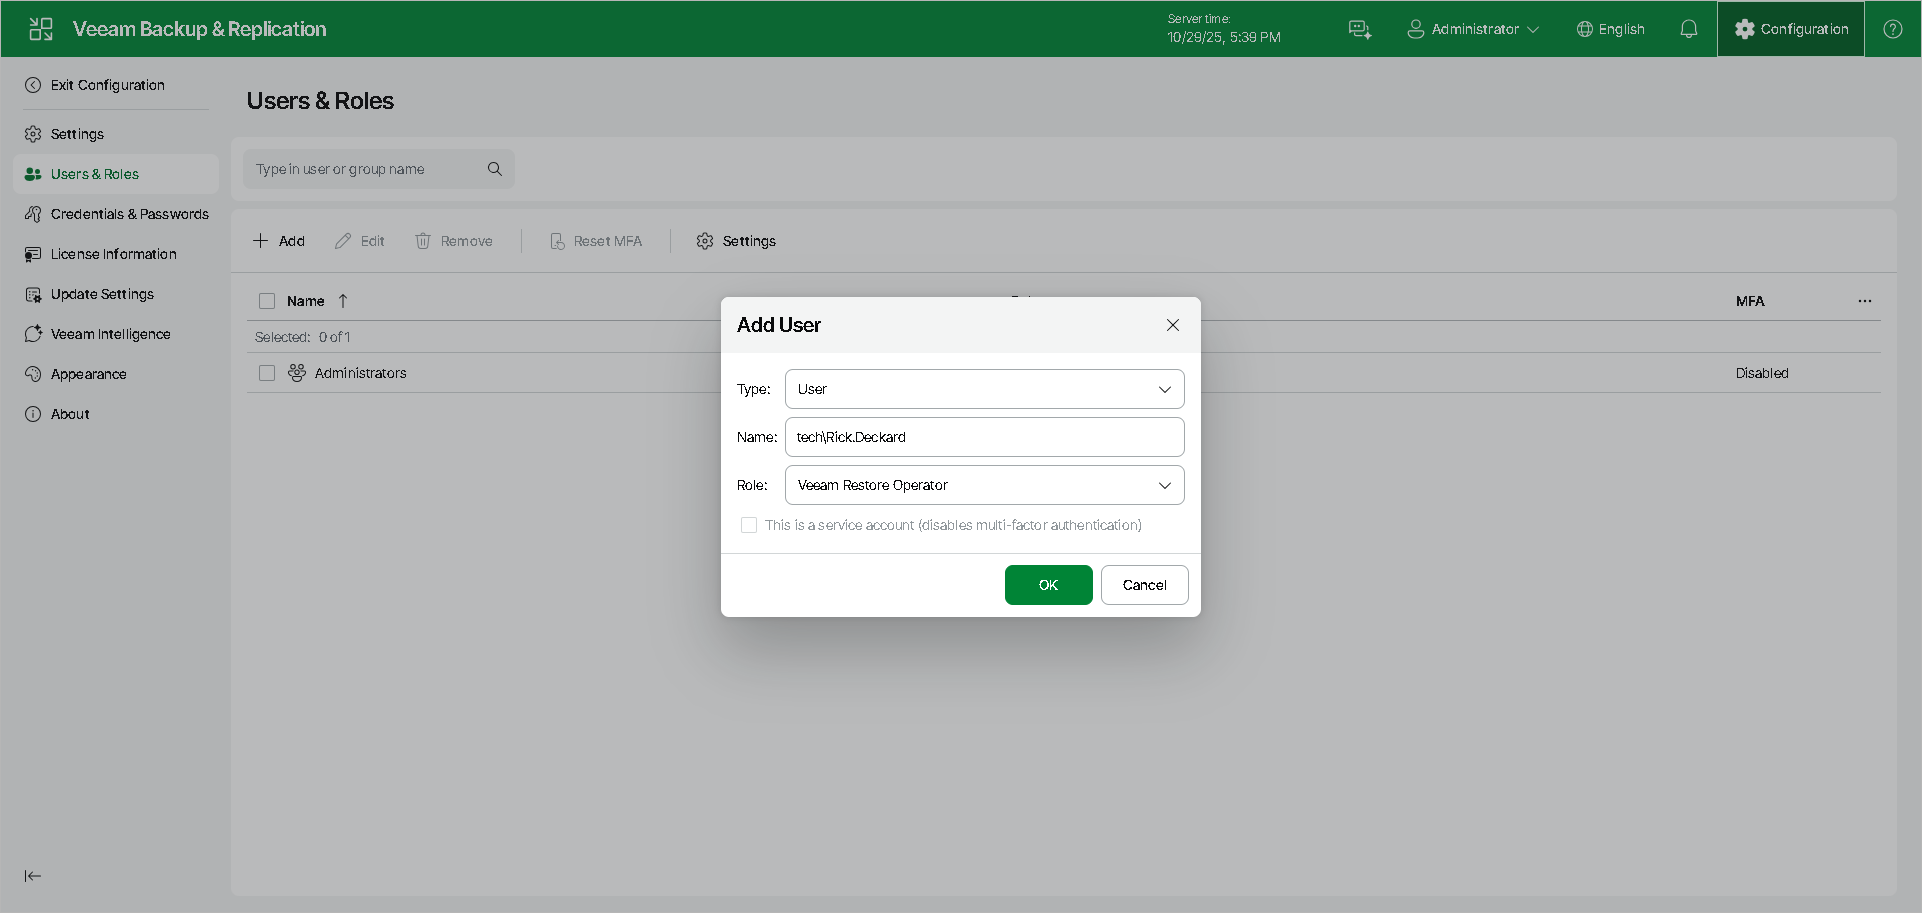
To add a user or user group:
- From the top bar, select Configuration > Users & Roles.
- Click Add.
- In the Type field, select User or Group.
- In the Name field, enter the name of a user or user group in the UPN format, for example, john.doe@tech.local.
To add a default domain security group, use the group@domain format, for example, Administrators@tech.local. For more information on all security groups, see this Microsoft article.
- From the Role list, select the desired role.
- Click OK.
To reduce the number of user sessions opened for a long time, you can set the idle timeout to automatically log off users. To do this:
- Click Settings.
- Activate the Auto logoff after <number> min of inactivity option and set the number of minutes.
For additional user verification, enable multi-factor authentication in the Settings section. For more information, see Multi-Factor Authentication.
Editing Users
To edit a user or user group:
- From the top bar, select Configuration > Users & Roles.
- Select a user or user group.
- Click Edit.
- In the Edit window, make necessary changes to the user or group.
- Click OK.
Removing Users
To remove a user or user group:
- From the top bar, select Configuration > Users & Roles.
- Select a user or user group.
- Click Remove.