Step 6. Specify Mount Server Settings
At the Mount Servers step of the wizard, specify settings for the mount servers that you plan to use for restores that work with guest OS files and application items.
During the restore process, Veeam Backup & Replication mounts the VM disks from the backup file residing in the backup repository to the mount server. As a result, VM data does not have to travel over the network, which reduces the load on the network and speed up the restore process.
At least one mount server is required for file-level and application items restore. If the Windows-based mount server or the Linux-based mount server is not selected, Veeam Backup & Replication will fail over to the default mount server. For more information on mount servers and default mount server selection, see Mount Servers.
To configure the mount server settings:
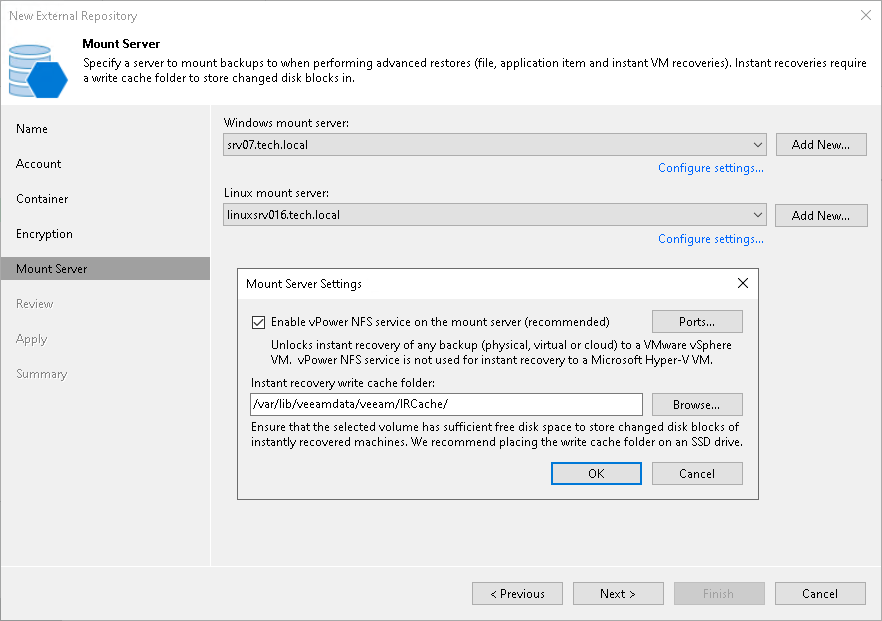
- From the Windows mount server list, select a Microsoft Windows server that you want to use as a mount server. The Windows mount server list contains only Microsoft Windows servers added to the backup infrastructure. If the server is not added to the backup infrastructure yet, click Add New on the right to open the New Windows Server wizard. For more information, see Adding Microsoft Windows Servers.
- From the Linux mount server list, select a Linux server that you want to use as a mount server. The Linux mount server list contains only RHEL/Rocky-based Linux servers added to the backup infrastructure and Veeam Software Appliance. If the server is not added to the backup infrastructure yet, click Add New on the right to open the New Linux Server wizard. For more information, see Adding Linux Servers.
- Click Configure settings to open the Mount Server Settings window.
- To make the backup repository accessible by the Veeam vPower NFS Service, select the Enable vPower NFS service on the mount server check box. Veeam Backup & Replication will enable the vPower NFS Service on your selected mount server.
|
Important |
|
Consider the following:
|
- Click Ports to customize network ports used by the Veeam vPower NFS Service. In the vPower NFS Port Settings window, specify the following settings:
- Next to the Mount Port section, specify the port that the Veeam vPower NFS Service will use to mount the vPower NFS datastore to the ESXi host.
- Next to the vPower NFS port section, specify the port that the Veeam vPower NFS Service will use to connect to the target NFS share.
- In the Instant recovery write cache folder field, specify a folder that will be used for writing cache during mount operations.