Step 2. Select Restore Point
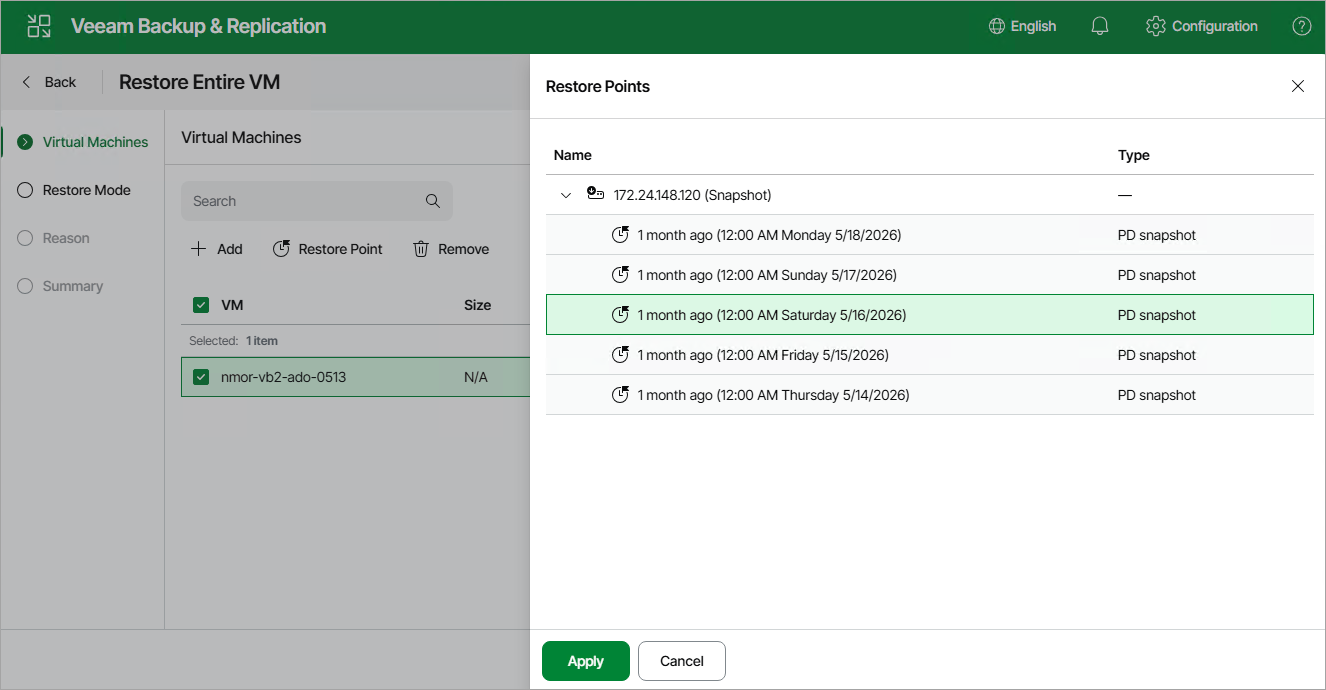
At the Virtual Machines step of the wizard, select a restore point that will be used to restore the selected VM. By default, Veeam Plug-in for Nutanix AHV uses the most recent valid restore point. However, you can restore the VM data to an earlier state.
To select a restore point, do the following:
- Select the VM.
- Click Restore Point.
- In the Restore Points window, select the necessary restore point and click Apply.
To help you choose a restore point, Veeam Plug-in for Nutanix AHV provides the following information on each available restore point:
- Name — the name of the backup job that created the restore point.
- Type — the type of the restore point:
- Backup — an image-level backup created by a backup job.
[Applies to the Prism Central deployment] Only backups are supported for restore to another cluster.
- Backup snapshot — a snapshot created by a backup job.
- Snapshot — a snapshot created by a snapshot job or manually taken in the Nutanix AHV Prism Element console.
|
Tip |
|
While creating a backup, Veeam Plug-in for Nutanix AHV takes a VM snapshot that is called backup snapshot. Veeam Plug-in for Nutanix AHV stores a recent backup snapshot for each backup job. Restore from the backup snapshot is significantly faster than restore from a backup. However, when you restore from the backup snapshot, limitations are applied. For more information on snapshots, see Snapshot Types, |
You can use the wizard to restore multiple VMs at a time. To do that, click Add, select more VMs to restore and select a restore point for each of them.