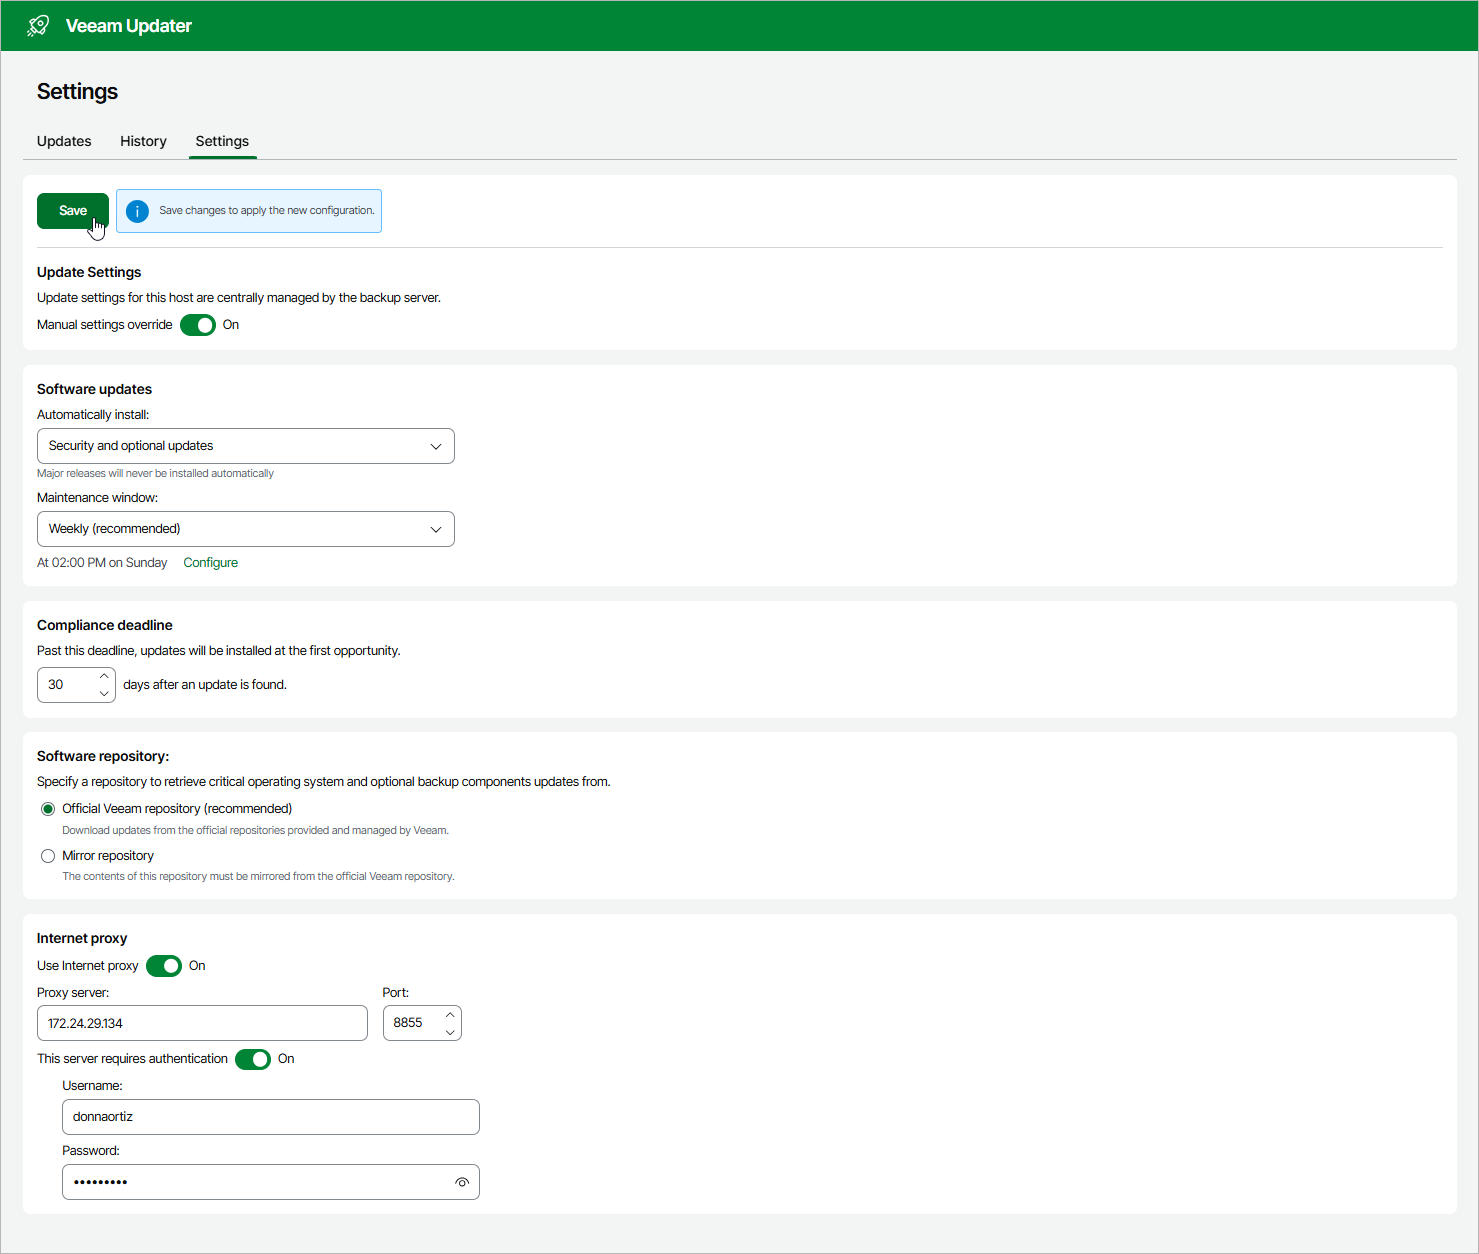
Configuring Update Settings
To configure custom settings that the backup appliance will use to check for and install available software package updates on a regular basis, do the following:
- Open the Veeam Updater page. To do that:
- Switch to the Configuration page.
- Navigate to Support Information.
- On the Updates tab, click Check and View Updates.
- On the Veeam Updater page, do the following:
- Switch to the Settings tab.
- In the Update settings section, set the Manual settings override toggle to On.
- In the Software updates section, choose whether the backup appliance will install all software updates (including security, .NET, PostgreSQL and other 3rd-party packages) or security updates only. Then, configure a maintenance window to choose whether you want to install these updates on a weekly or monthly basis.
|
Tip |
|
If you plan to install software updates manually, select None from the Maintenance window drop-down list. Then, follow the instructions provided in section Installing Updates. |
- In the Compliance deadline section, specify a time period after which the backup appliance will force update installation — as soon as this period is over, the the updates will be installed regardless of the configured maintenance window. The maximum deadline is 90 days.
- In the Software repository section, choose whether you want to download updates from official Veeam repositories or from a server that hosts your own local copy of these repositories. In the latter case, you must also specify the server URL and upload a self-signed certificate (if necessary).
Keep in mind that to allow the backup appliance to access the repositories, you must open a number of ports required for outbound internet access. For more information, see Ports.
- If the backup appliance has no direct internet access, configure an HTTP proxy to allow the Veeam Updater service to access the required resources. To do that:
- In the Internet proxy section, set the Use Internet proxy toggle to On.
- In the Proxy server field, enter the IP address or FQDN of the proxy.
- In the Port field, enter the port used on the proxy for HTTP connections.
- If the HTTP proxy requires authentication, set the This server requires authentication toggle to On. Then, specify credentials of the user account configured on the proxy to access the internet.
|
Important |
|
Accessing resources through HTTPS proxies is not supported. |
- Click Save.