Step 4. Configure Mapping Settings
At the Disk Mapping step of the wizard, do the following:
- Click Choose.
- Choose a target VM to which you want to attach the restored disks.
By default, Veeam Backup & Replication attaches the restored disks to the original VM.
|
Important |
|
While restoring a disk that will be used to boot the target VM, Veeam Backup & Replication will power the VM off during the recovery operation. It is recommended that you stop all activities on the target VM till the restore session completes. |
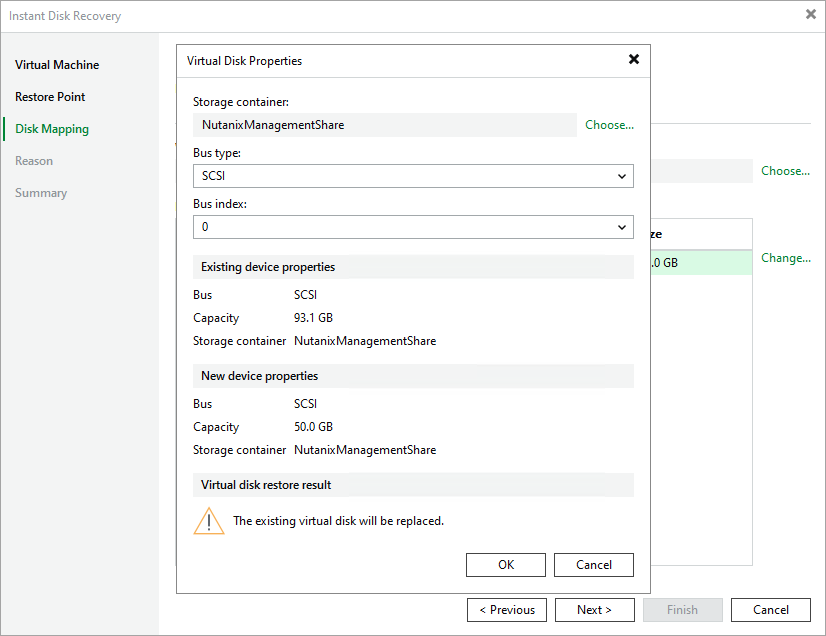
- Select a virtual disk to restore and click Change.
By default, Veeam Backup & Replication attaches the restored disk to the target VM as a new disk. However, if you want the restored disk to replace the existing disk, or if you want to change the disk bus type and to specify a storage container for the restored disk, configure disk settings.
|
Note |
|
You can select a storage container only if you restore from a backup. |